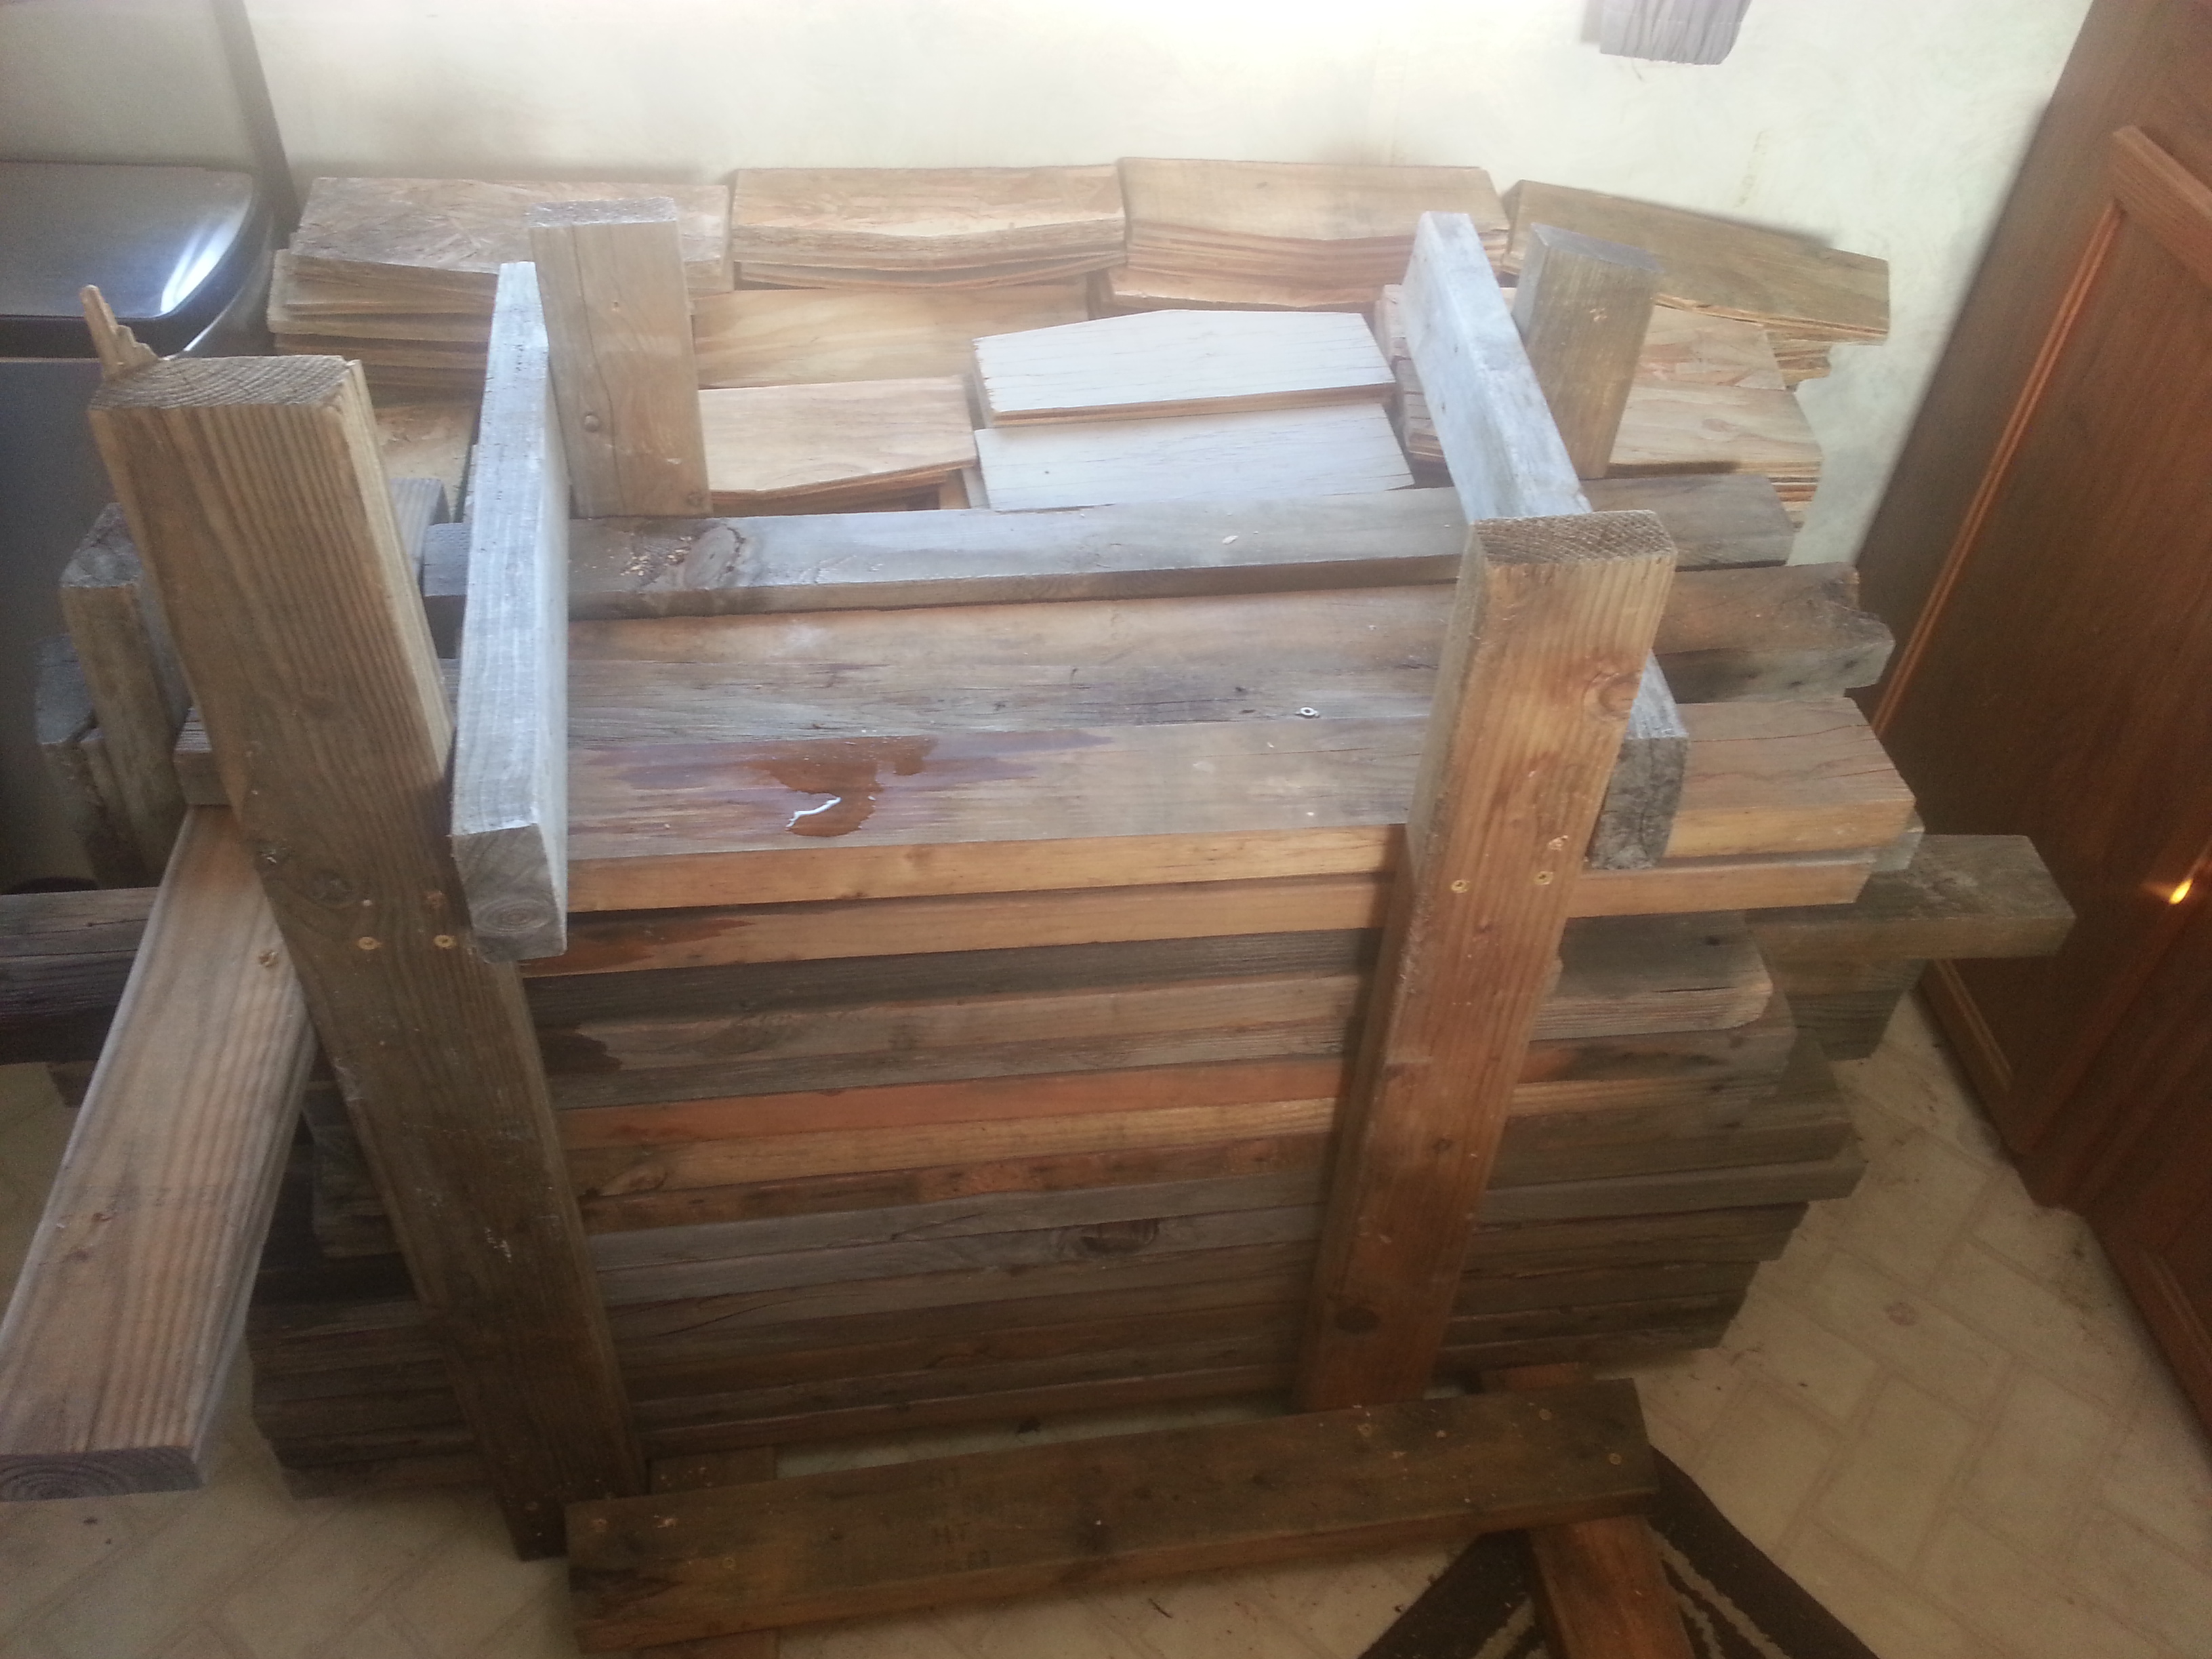
As we prepared to head south for the winter, I took stock of some materials I’ve been storing outside in the desert near Boise, ID for too long and decided it would be fun to do something with them — to actually use them to build a building somewhere especially now that we’re retired and have the time to play around with something like this. There aren’t many rules at The Slabs so I decided to pull the trigger and see how much I could get done in a short time on a minimal budget. Mostly I couldn’t bear the thought of these materials spending another winter — unprotected and outdoors — so it was one of those “now or never” moments. We loaded the materials up into our kitchen (and our bedroom!) and headed south. It was pretty entertaining because the boards in the kitchen kept tipping over and I’d have to restack them again and again. In my desperation, I finally screwed together a temporary ‘rack’ of sorts to hold the boards together and that worked well enough to get them from Idaho to extreme southern California (45 miles north of the Mexican border).

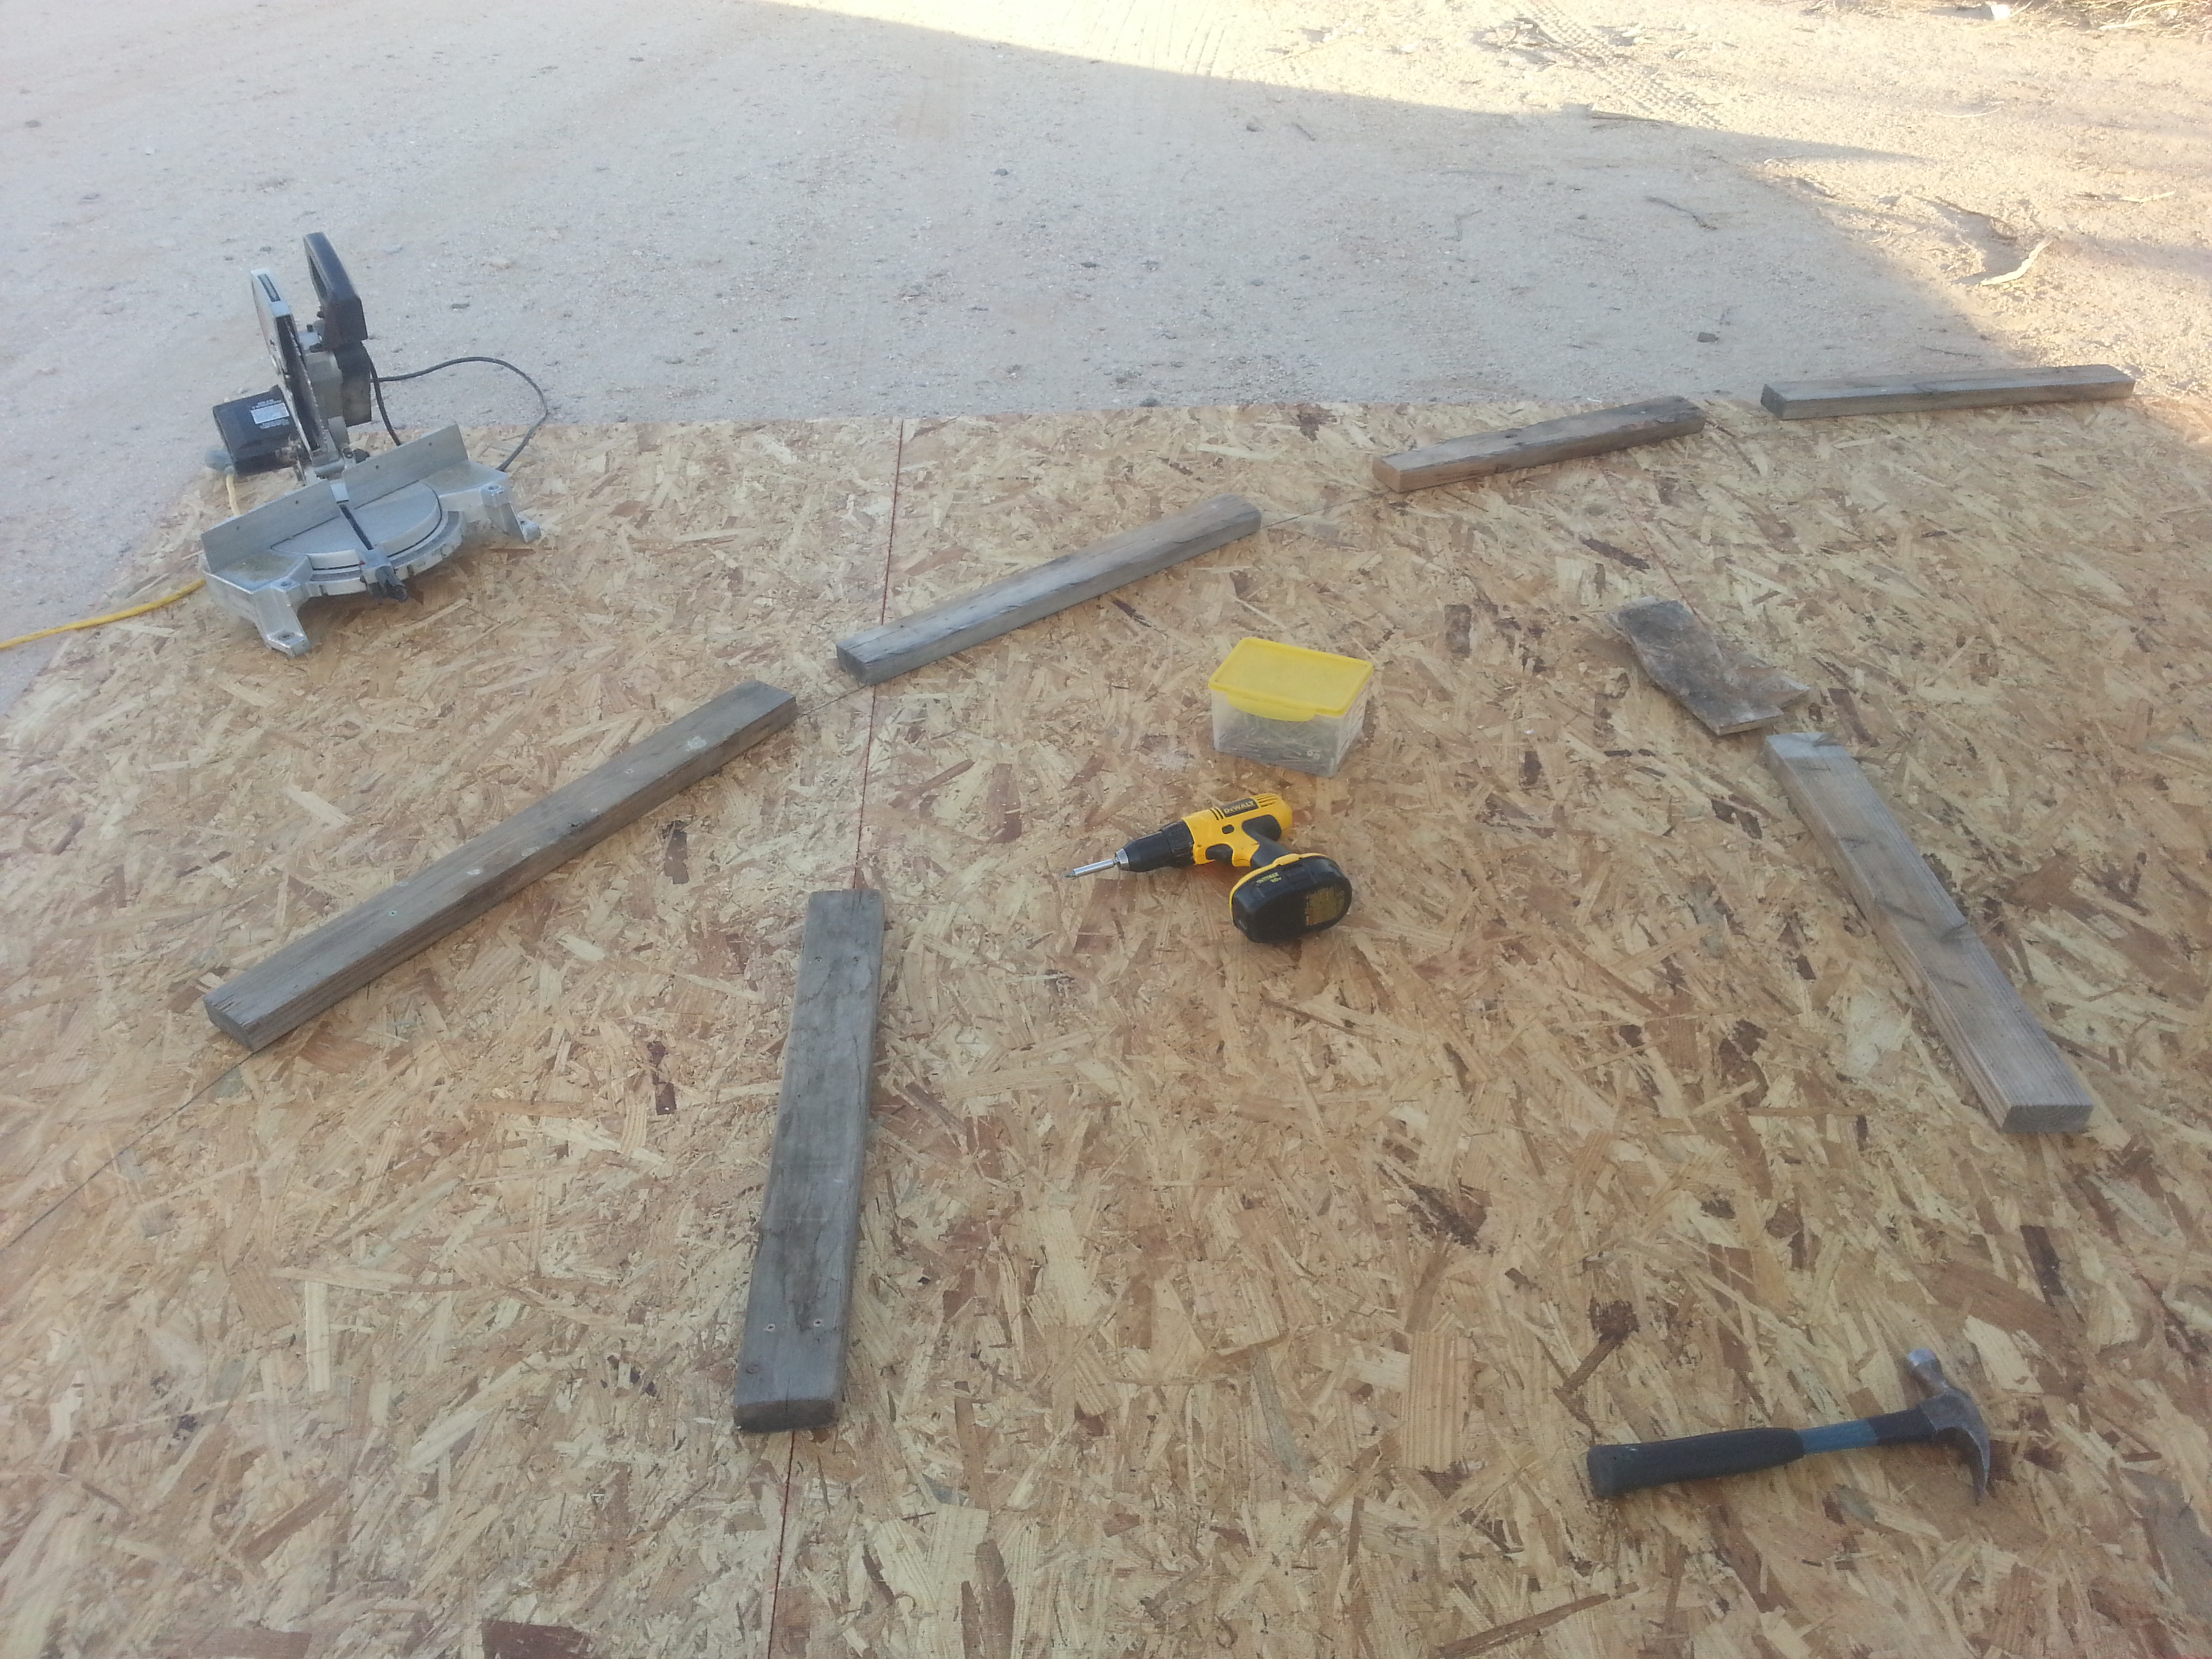
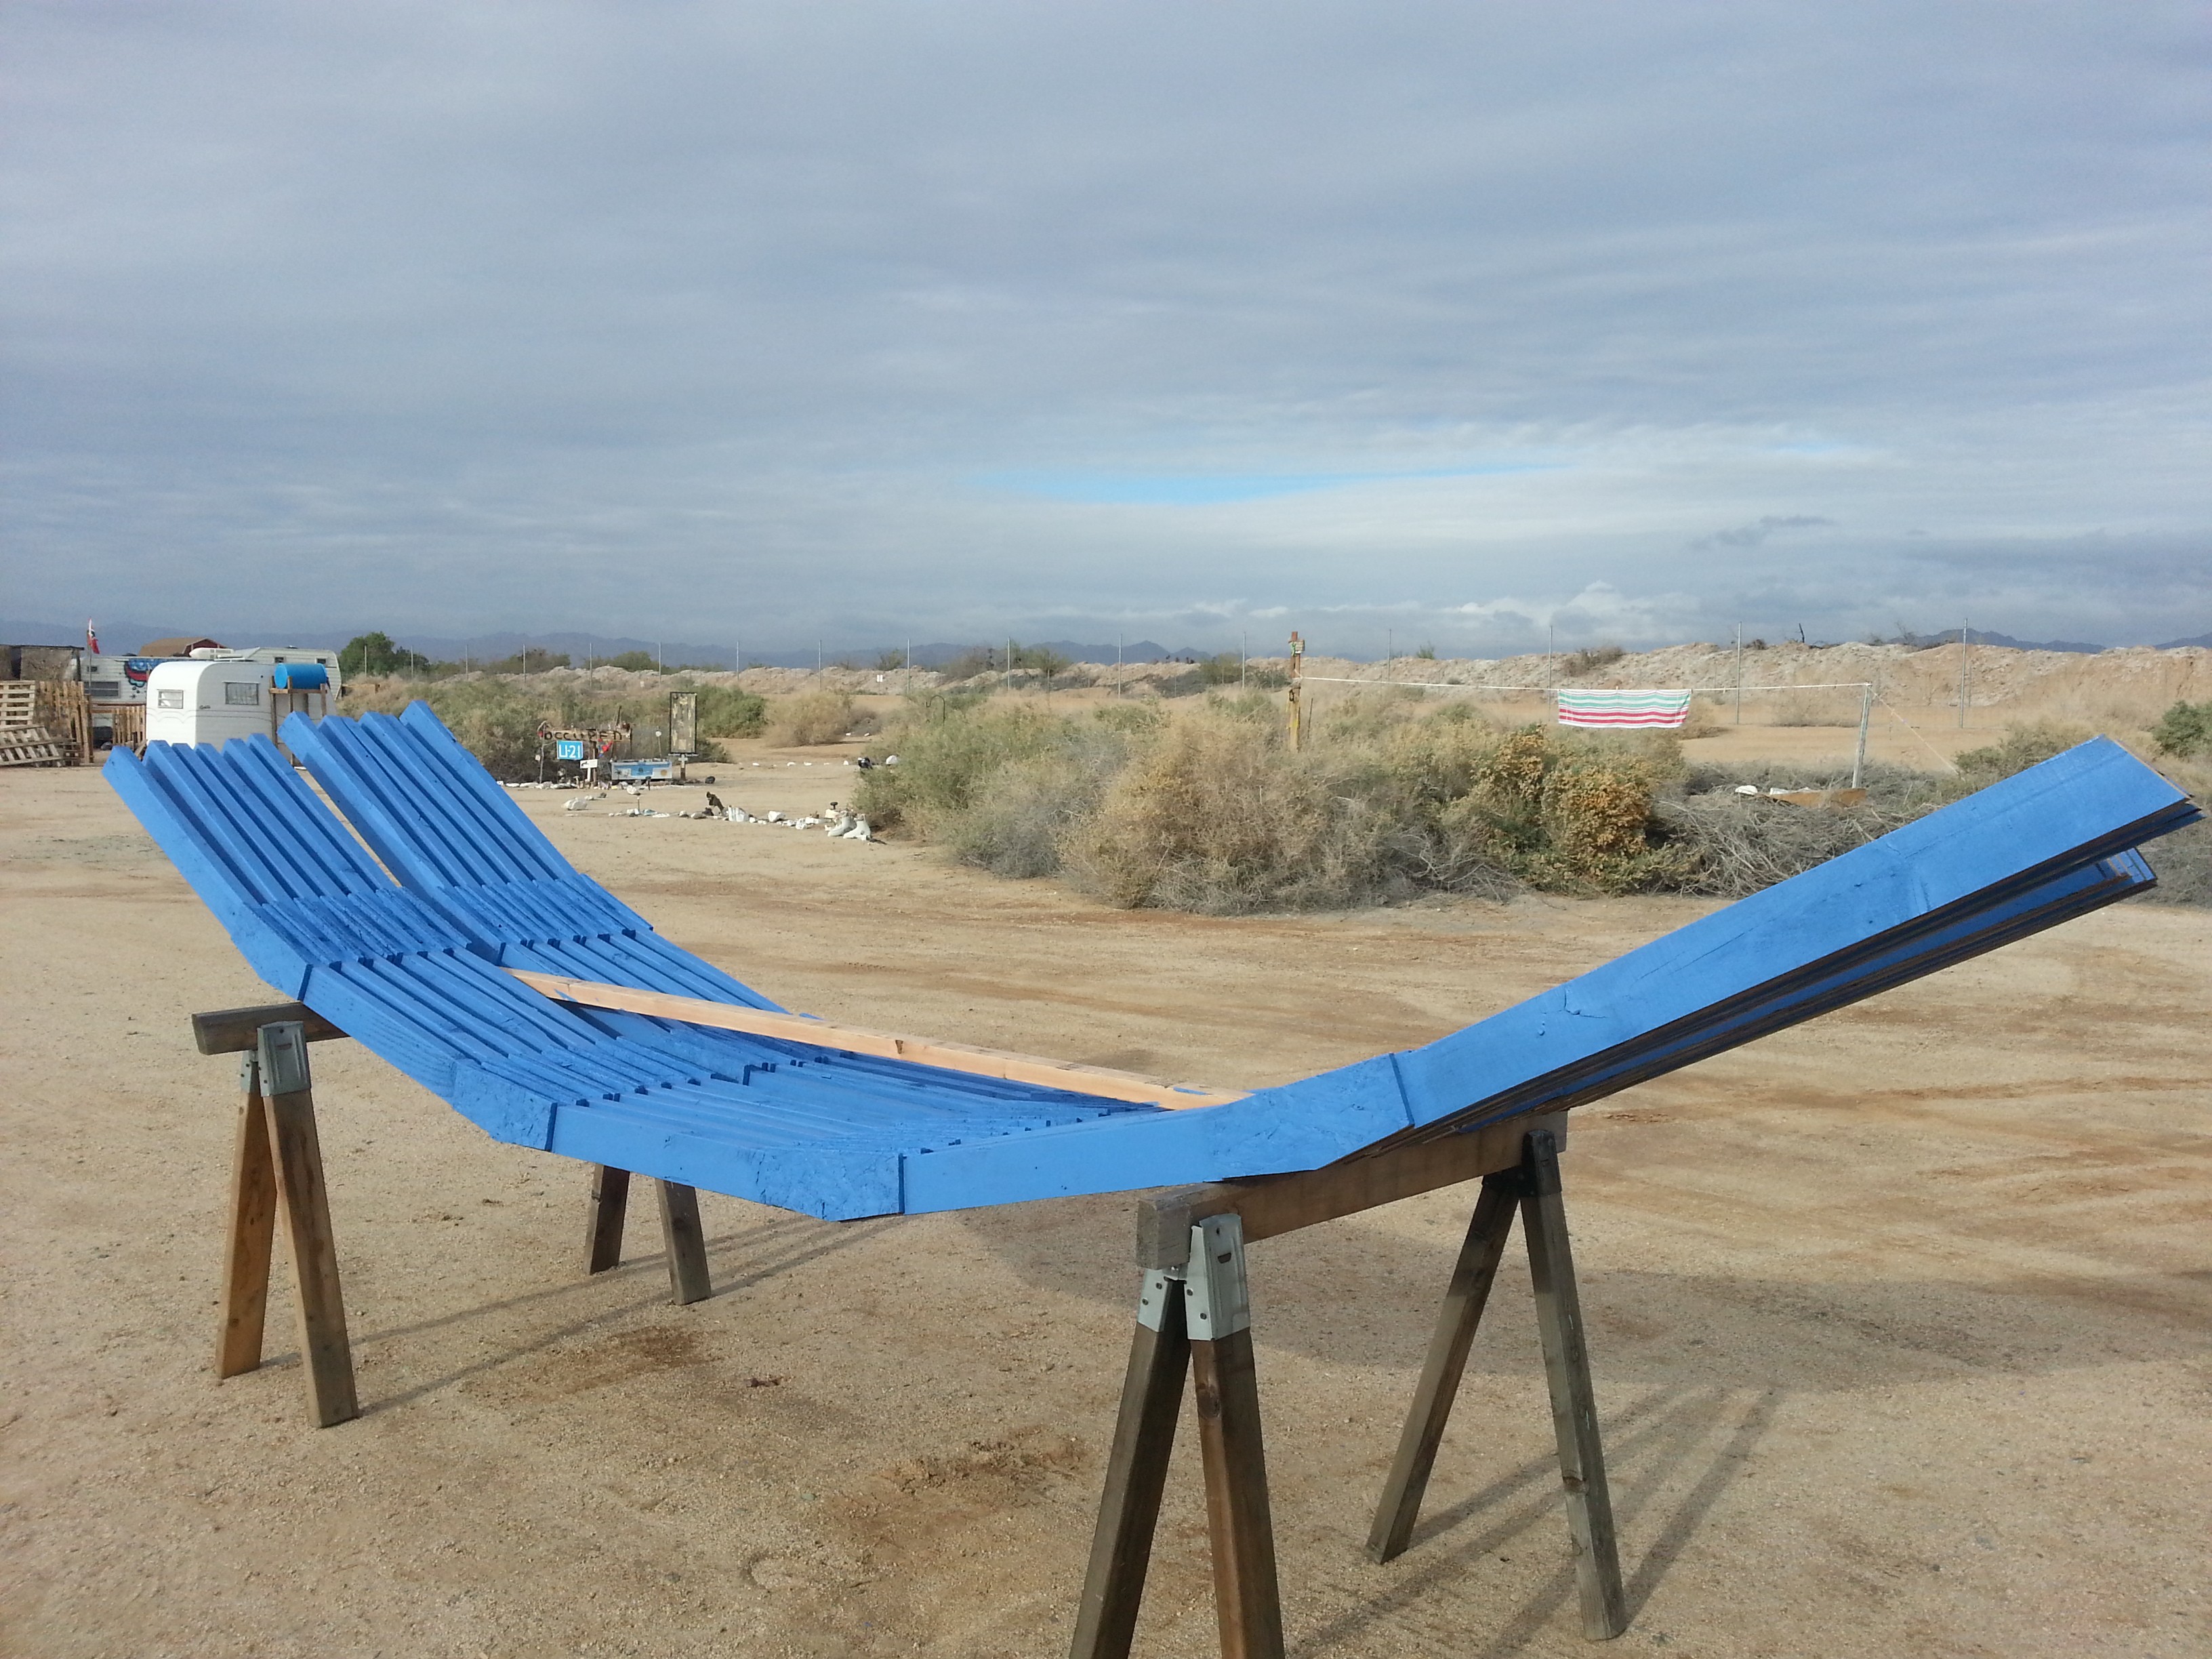
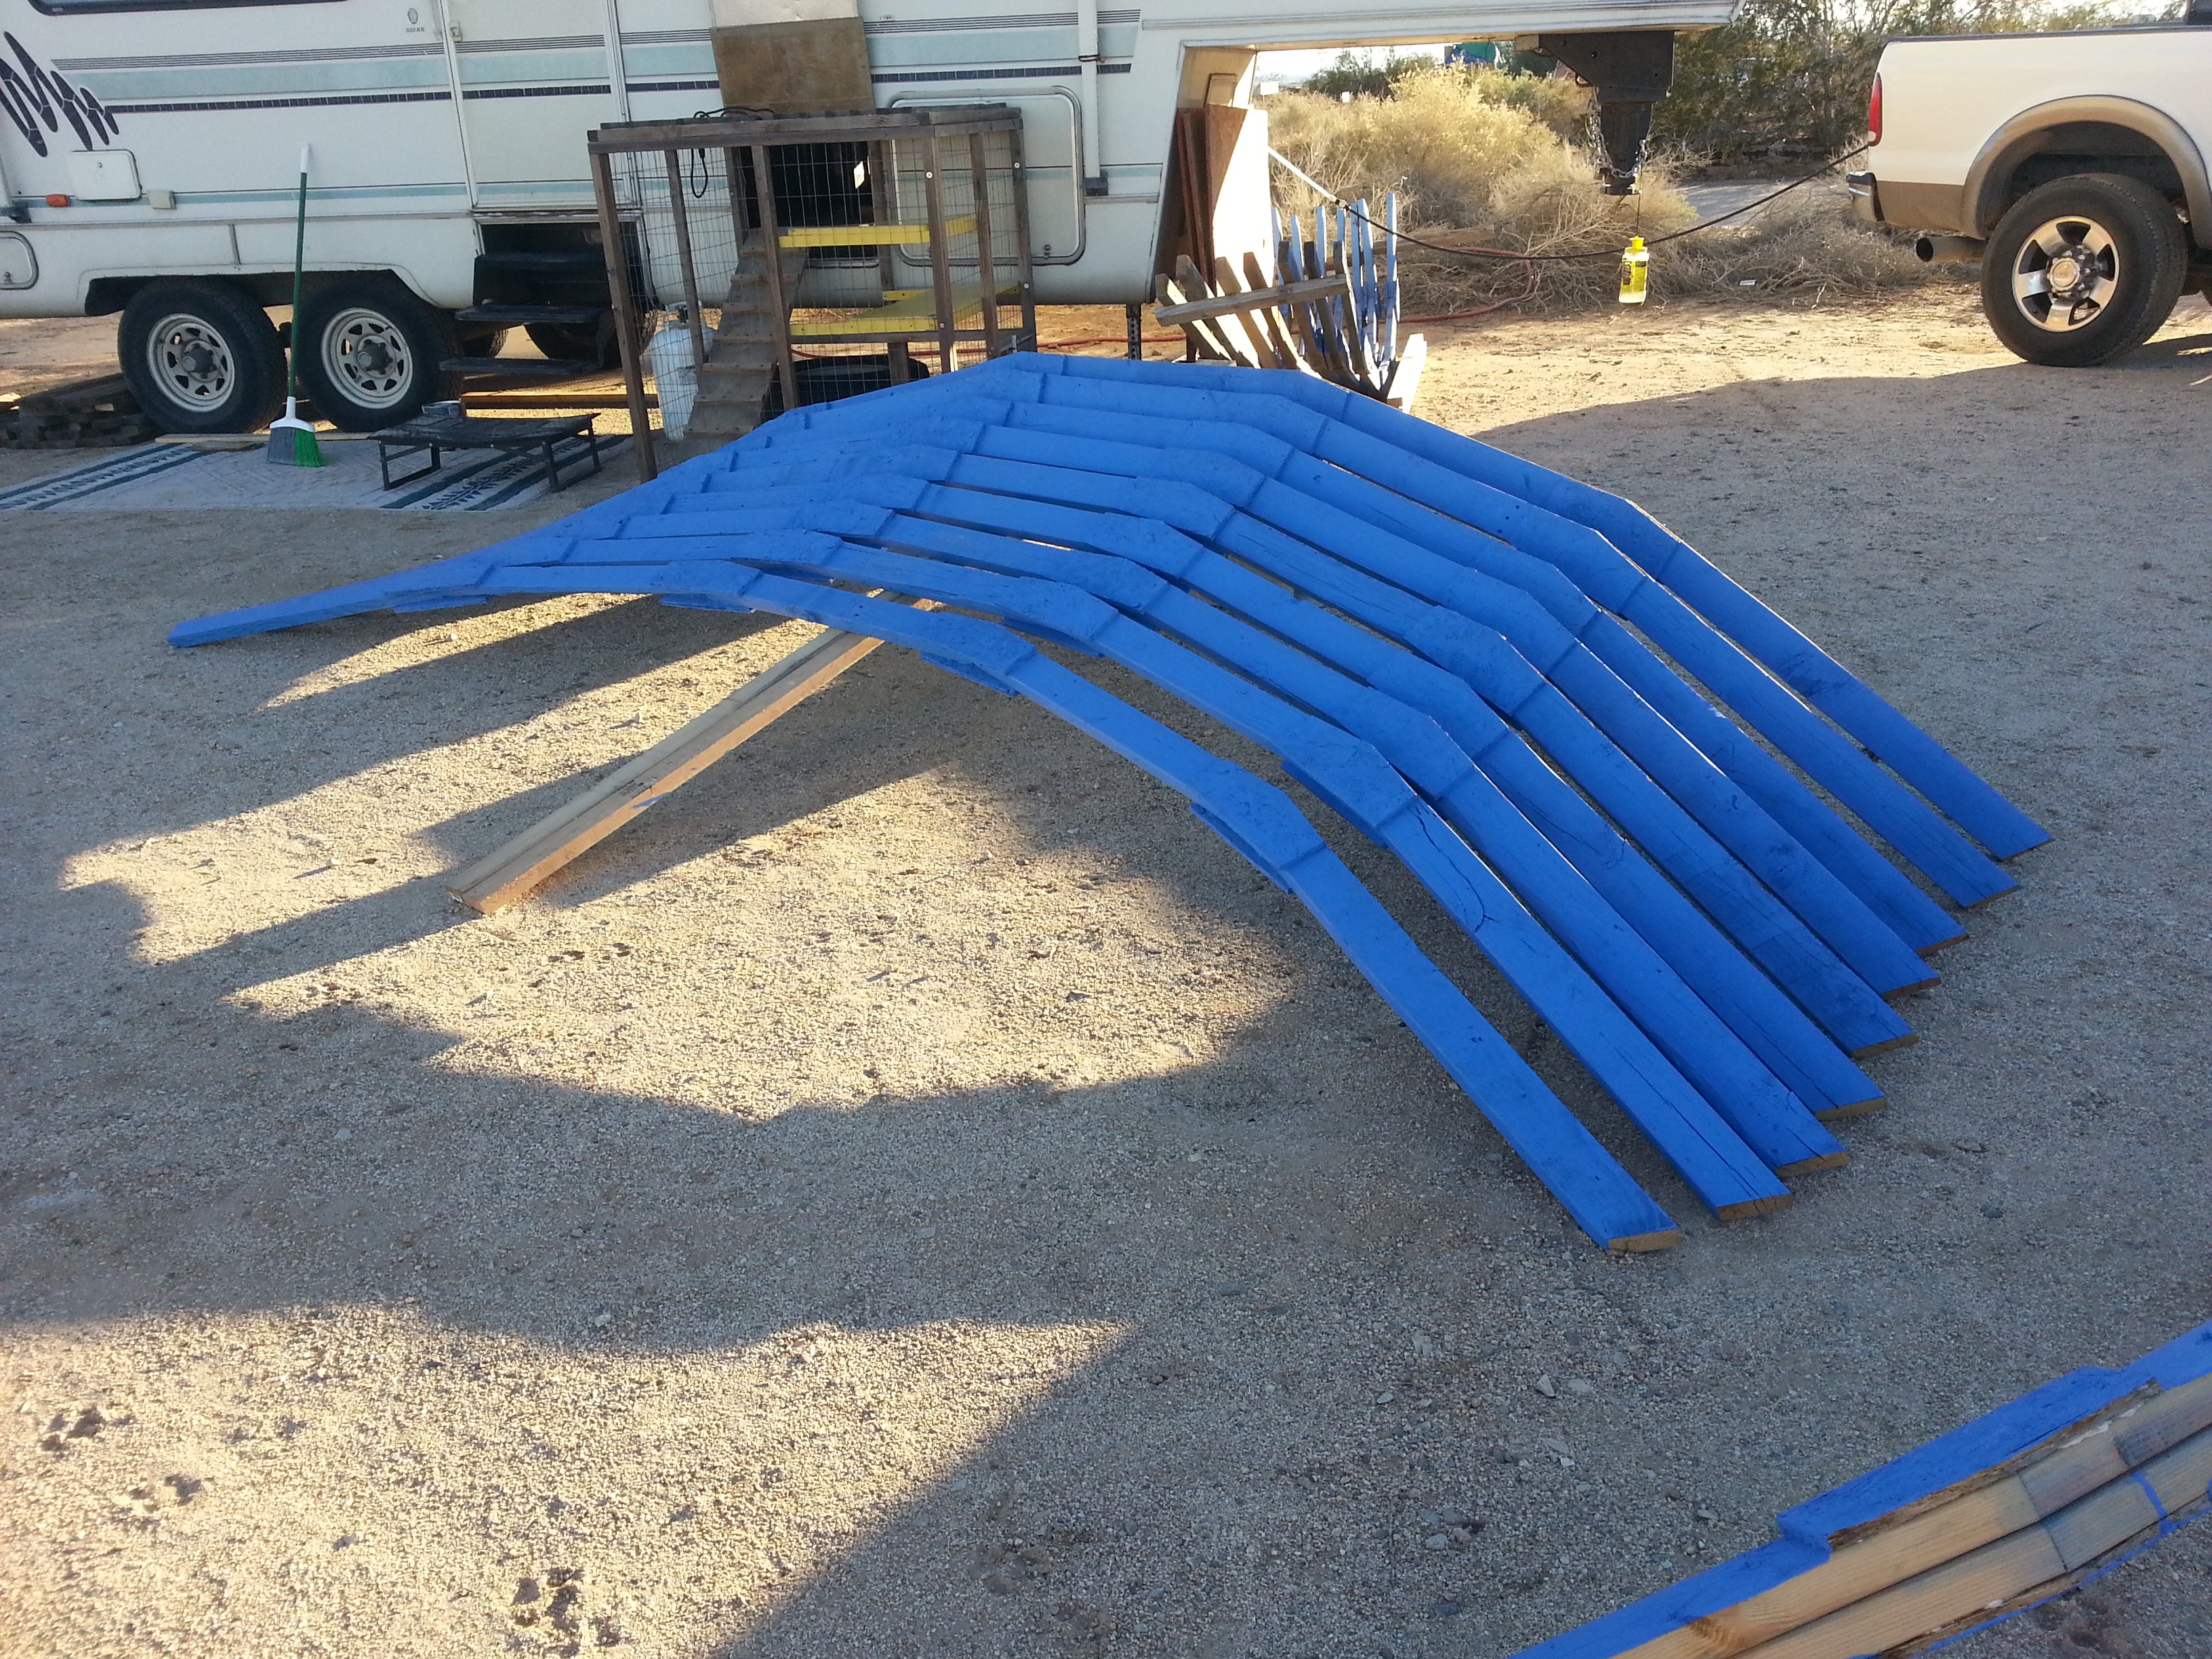
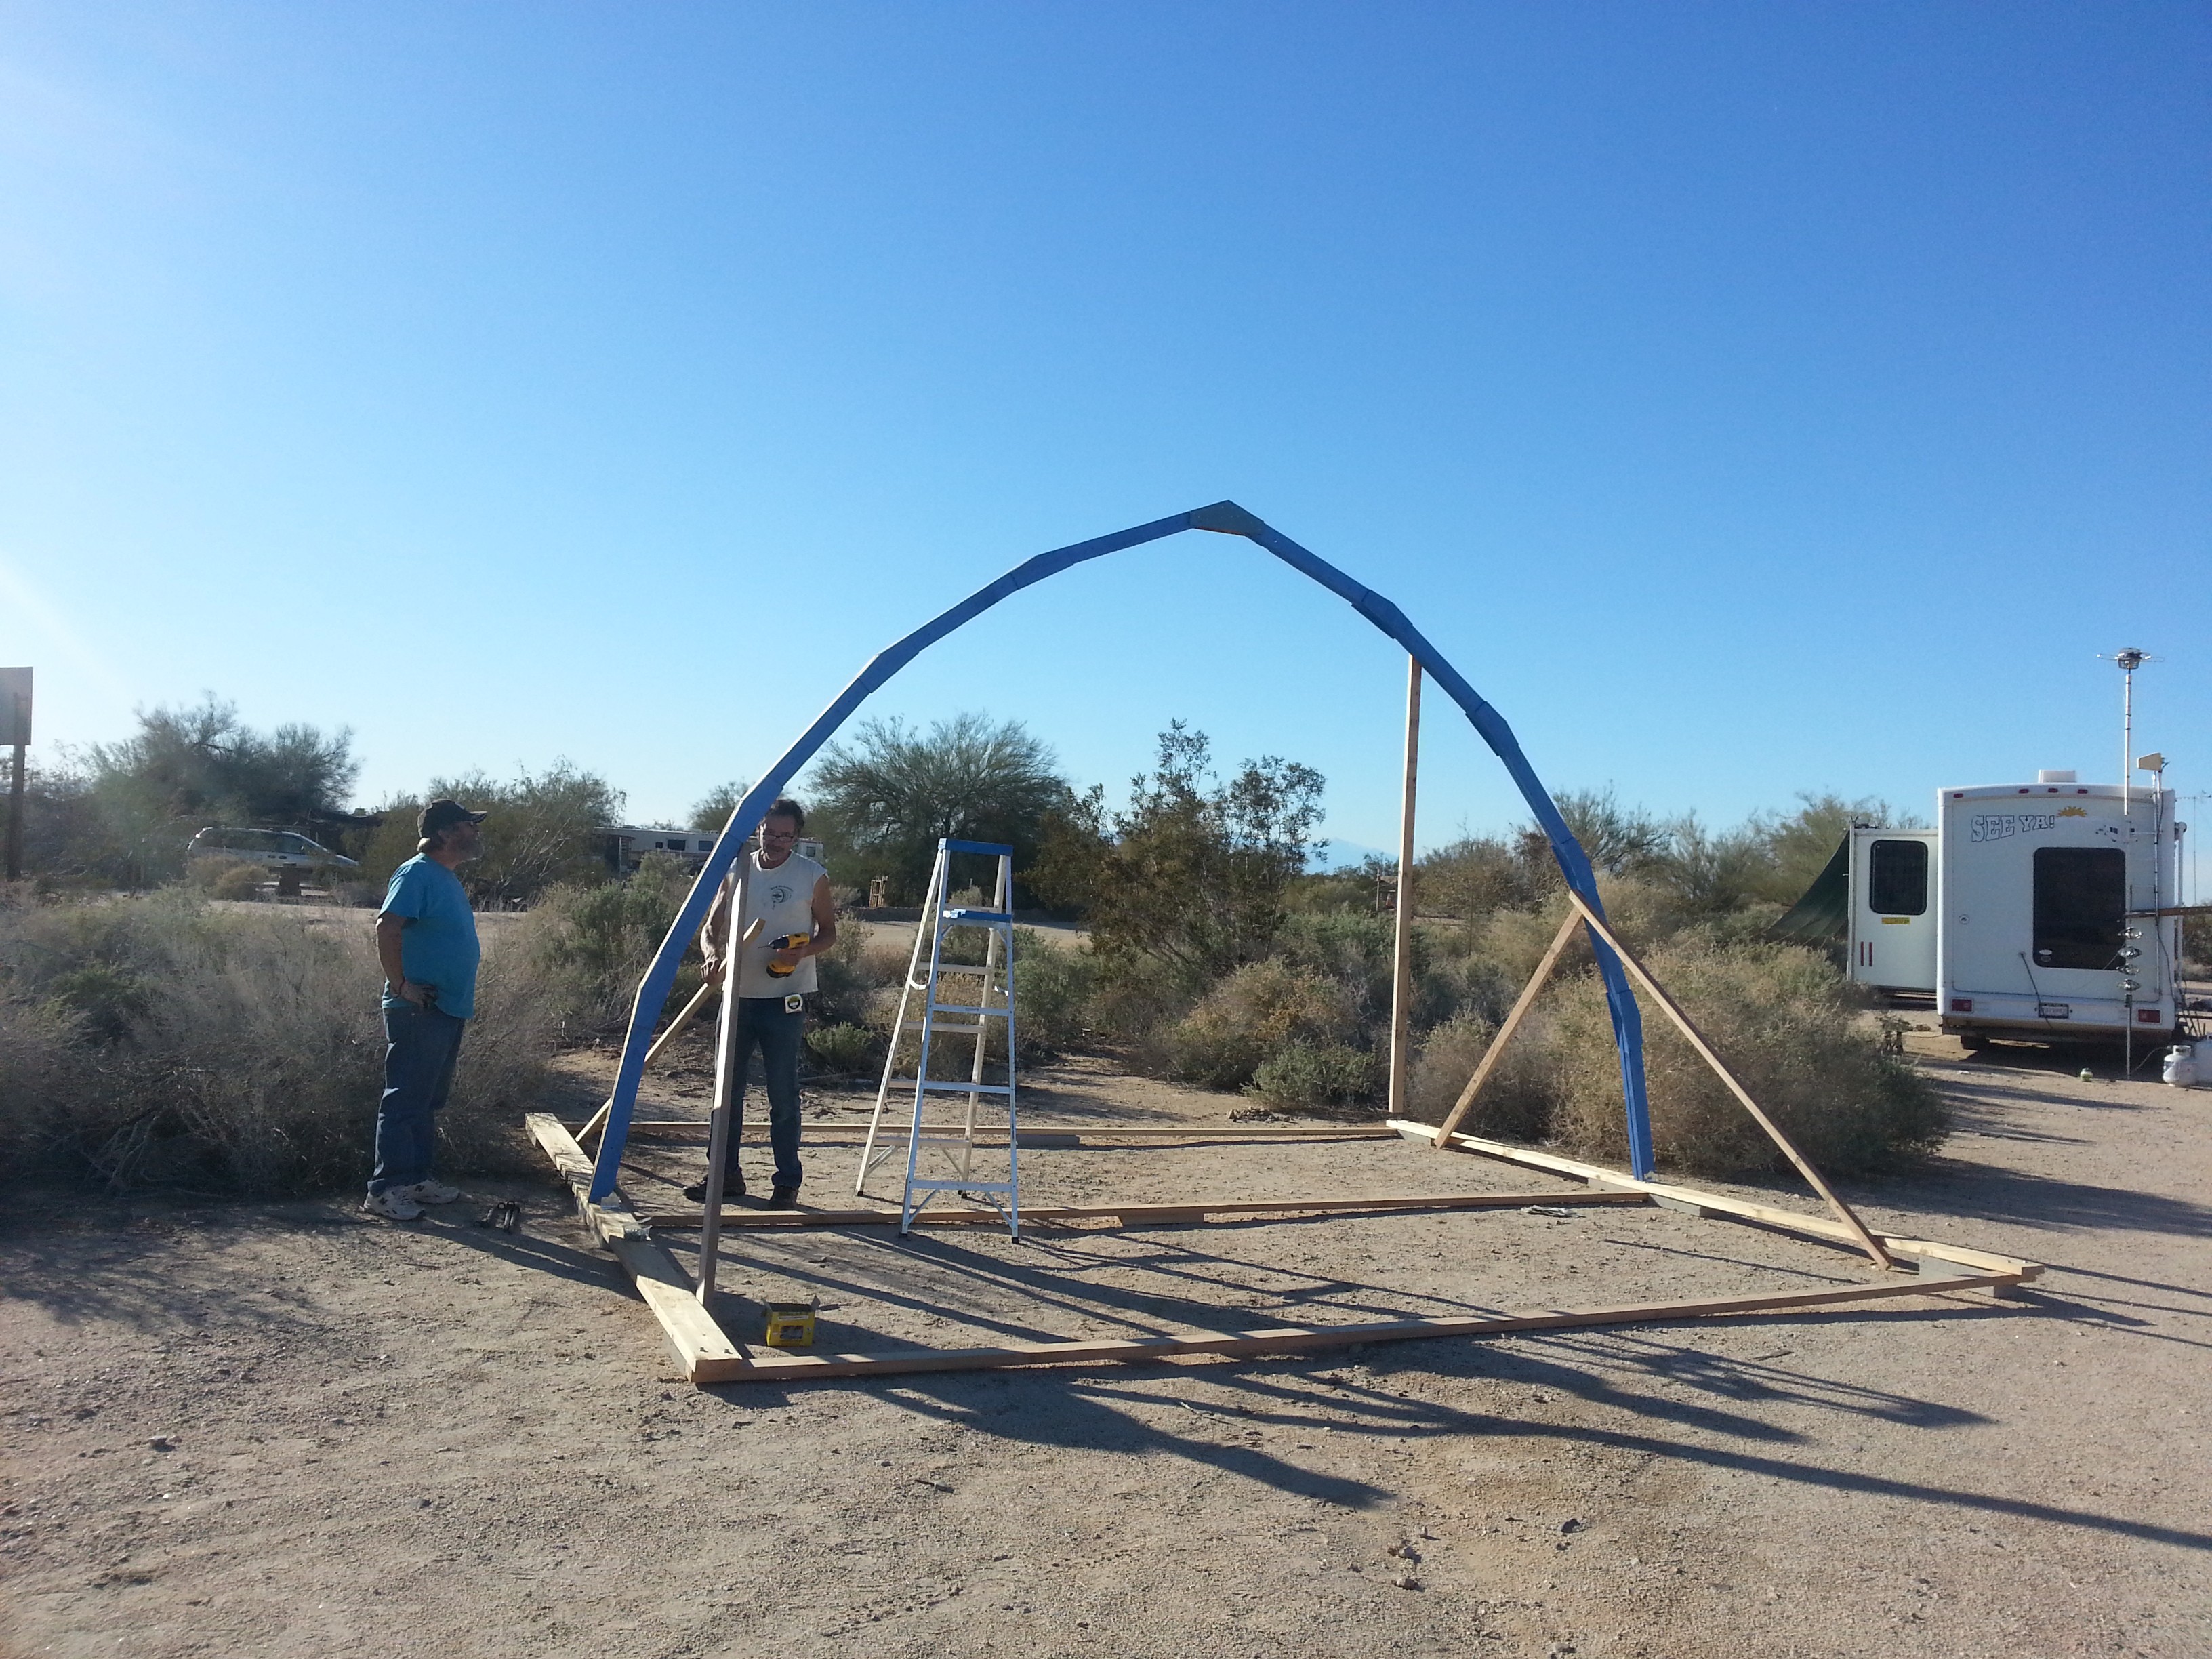
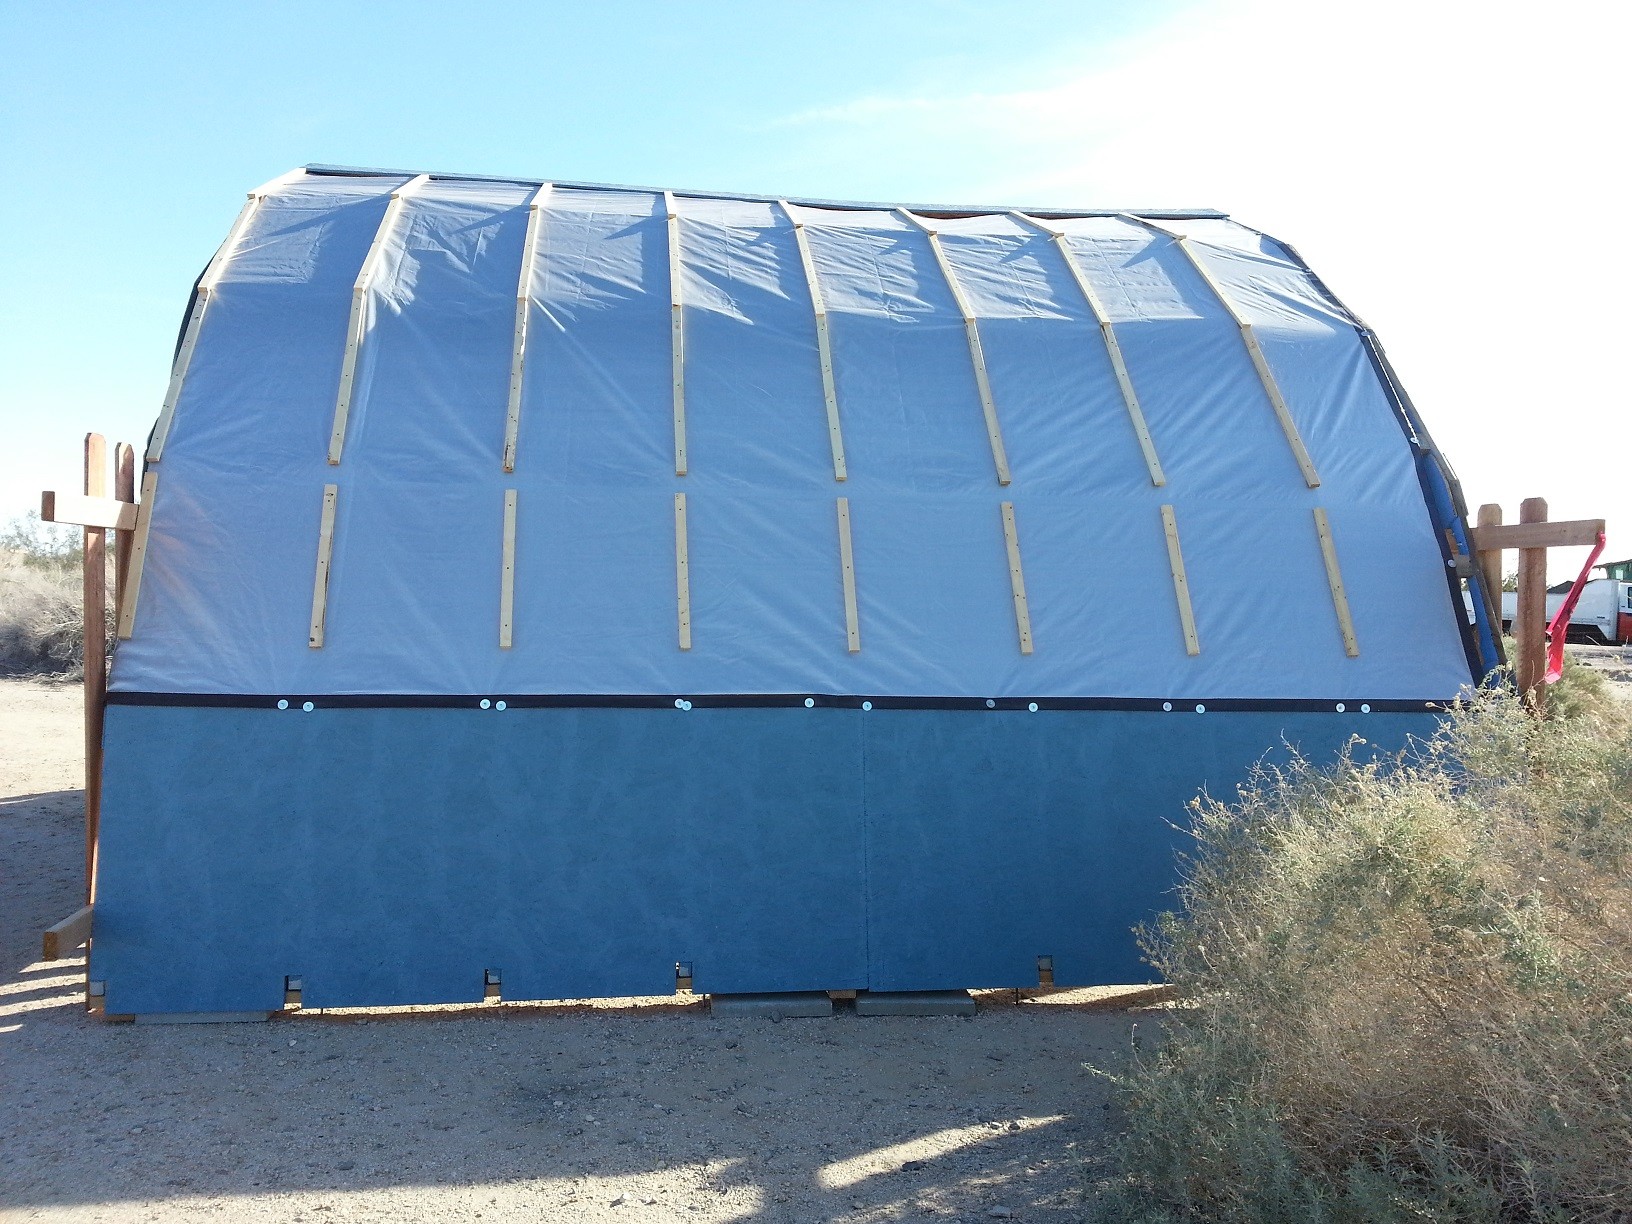
Once we were back here and settled in at The Slabs, my labor of love began in earnest. First I took four sheets of OSB and fastened them together on the ground to make my jig — to assemble ‘ribs’ which would become ‘arches’ to construct what I call a Pallet Gothic Arch building. On the sheets of OSB, I used a 12′ radius to draw out a curve based on what is to become an 18′ wide building. Then I laid out the points of intersection for the 3′ chunks of 2×4 — originally designed to be salvaged from used shipping pallets. This building method also borrows from a method called “rigid arch construction” where plywood plates and construction adhesive are used to join the various components — permitting wide open structures with no interior support. The arches form what becomes the long walls *and* the roof — leaving the vertical end walls for doors and/or windows. All the glue plates are secured with construction adhesive and twenty 2″ galvanized box nails on each side.
It’s a very low cost way to enclose space — also very strong when done properly — but it’s well outside the norms of engineering approvals and building code compliance — especially when using used lumber. Based on pics of a scale model I made, Pete built one of these (32′ long) in northern Idaho in heavy snow country. Having never met, we communicated the details back and forth with Emails and pictures while also sharing them with my online building group. Based on his real-world experience over several winters, I’ve determined the basic structure is plenty strong enough . . . even overkill for areas which don’t get significant snow loads. To use up all my ‘old’ 3′ components, I determined our “barn” should be 18′ wide and 16′ front to back. That was big enough to use up all the ‘old’ lumber *and* six 12′ chunks of new 2×4 so we painted all of them with some mis-matched blue paint (cheap at $9 a gallon at Home Depot) for a more uniform appearance.
 If you’re inclined to build anything significant here at The Slabs, the usual MO is to keep your investment small as you likely won’t be here 24/7 to protect it. Most of us mortals head north during the extremely HOT summer months here in the Mojave desert and come back during the winter months when prevailing temps are more inclined to support human life. We like to believe that our hard work and investment will still be here when we come back next time but there are no guarantees. In our case, we have our good friend George nearby and he can kinda’ keep an eye on the barn for us but all arrangements are very loose and in a constant state of flux — what military types would call “a highly fluid situation.” Worst-case scenario? We’re out $500 and our time — most of which was spent doing fairly pleasurable activity — not to be confused with WORK. Better-case scenario? We come back in the fall and continue building — having fun with our daily progress and visiting with those who take an interest in what we’re doing.
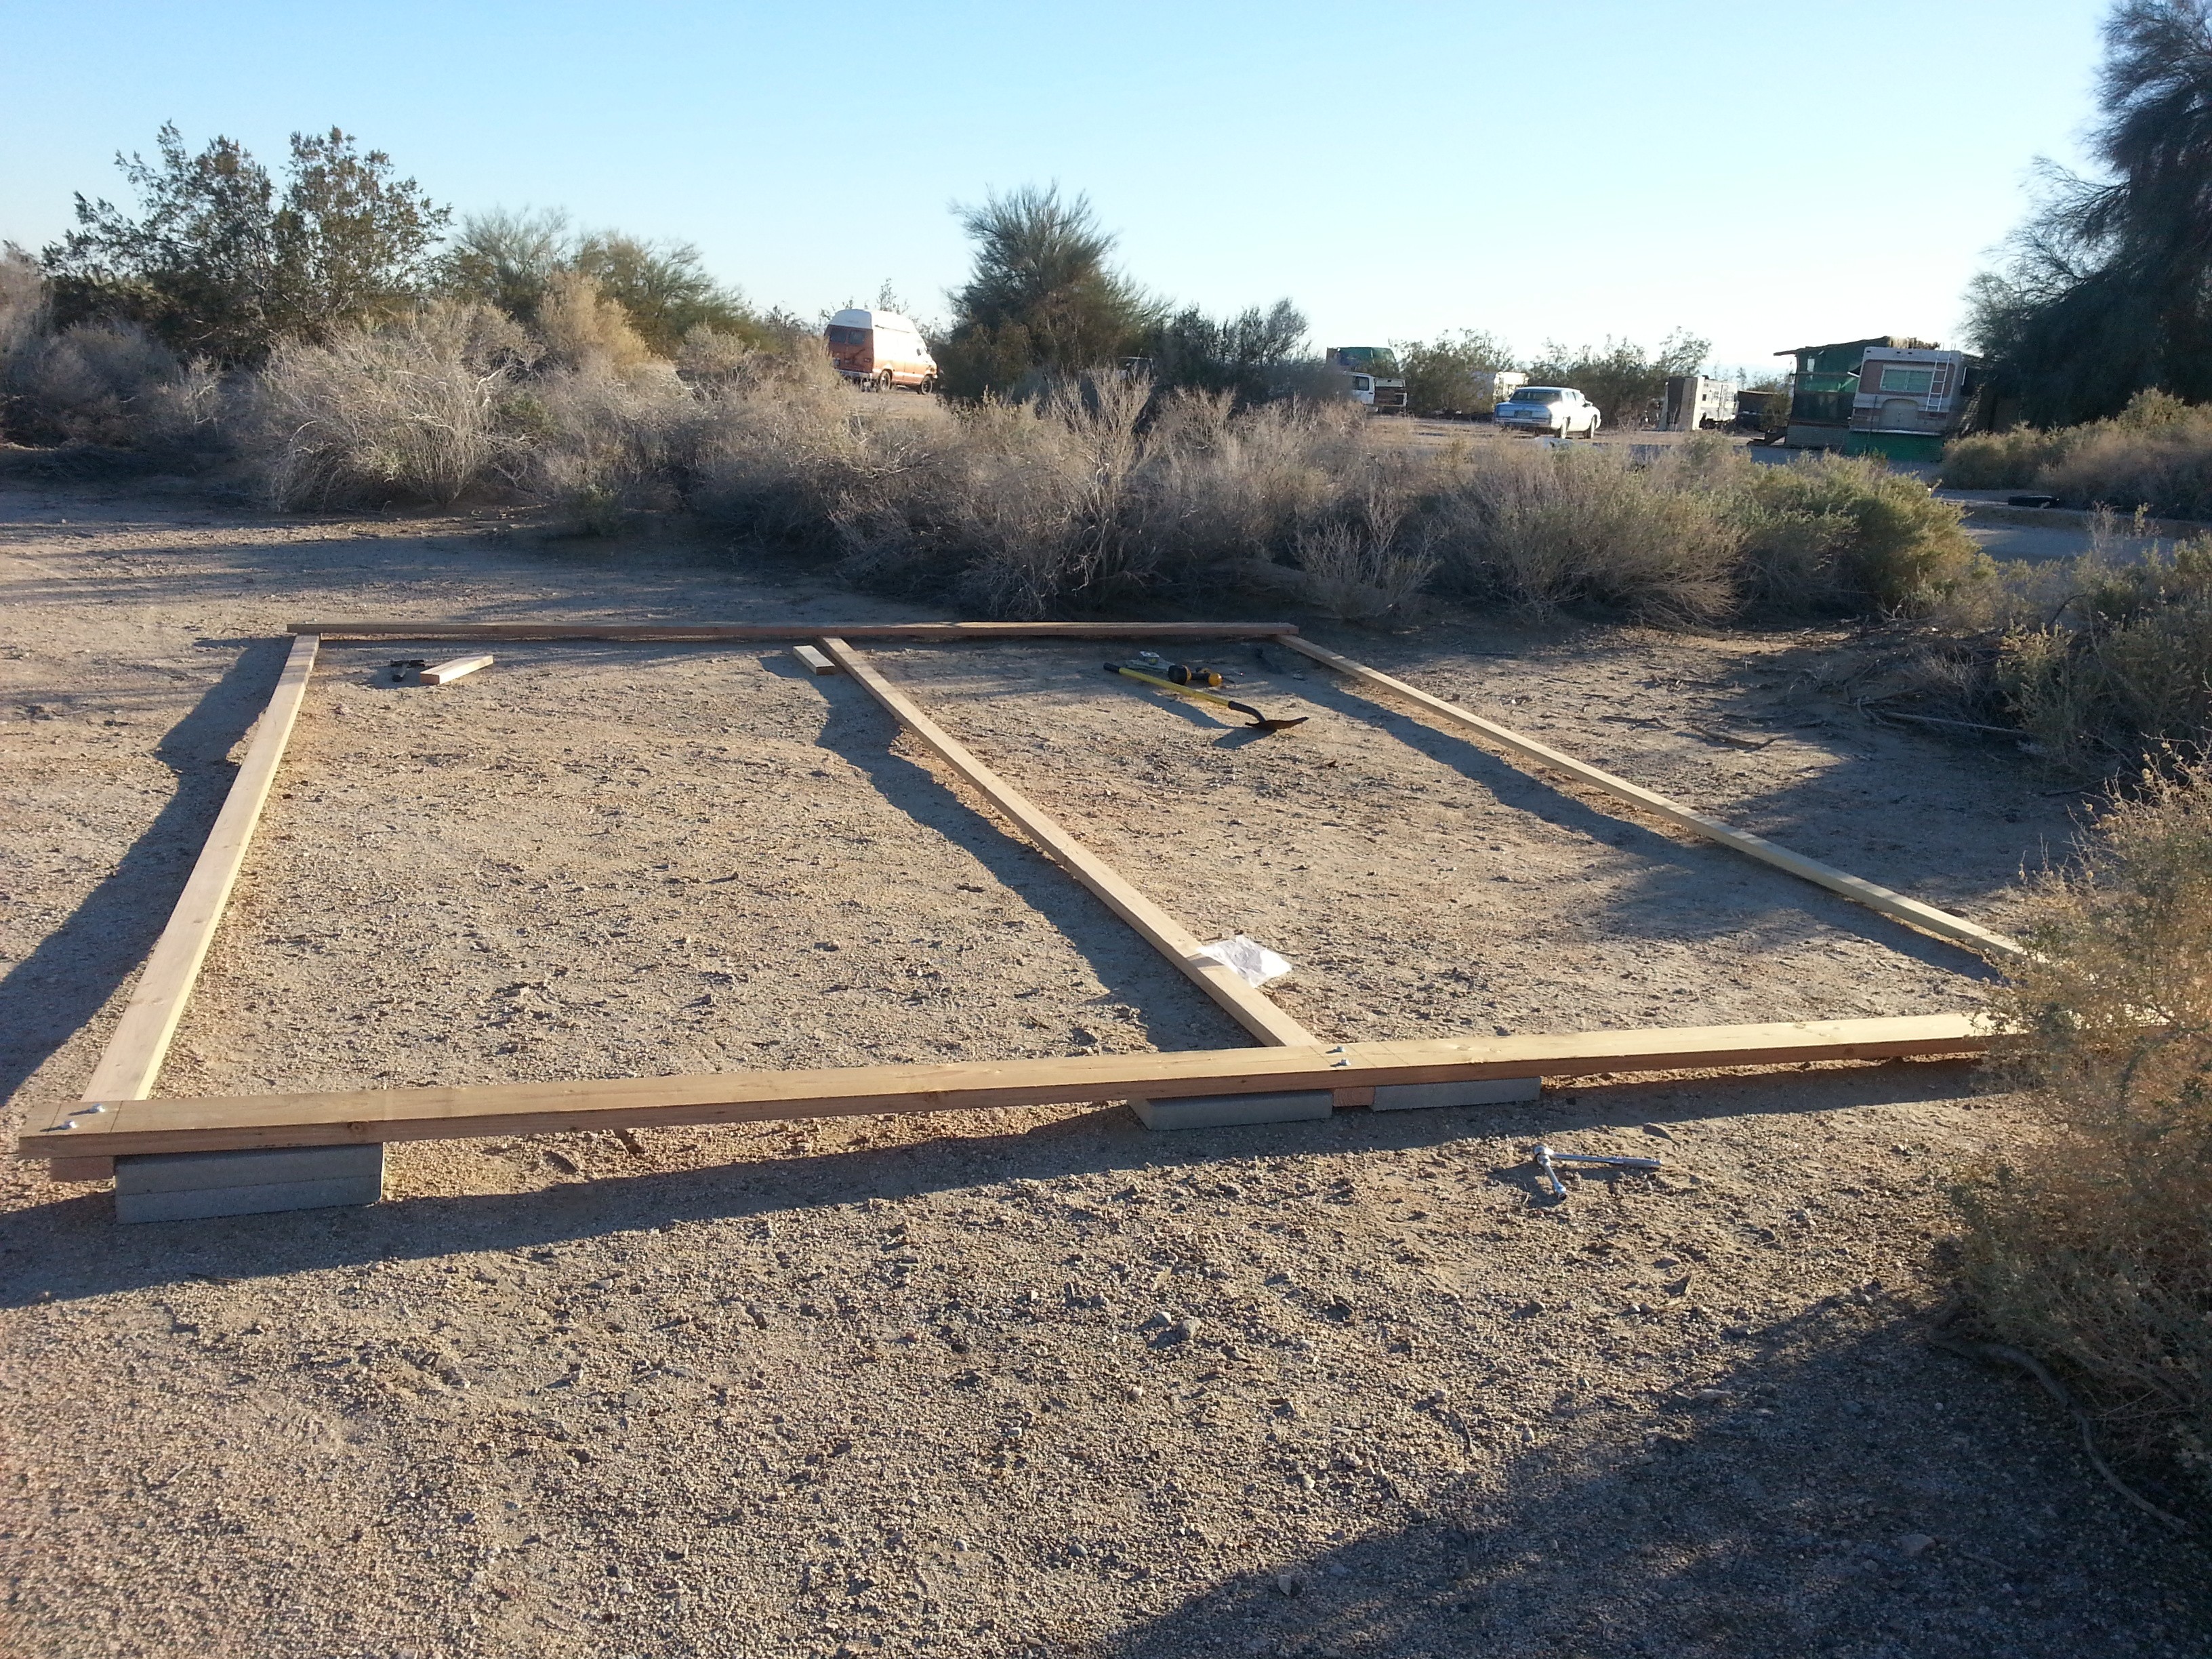
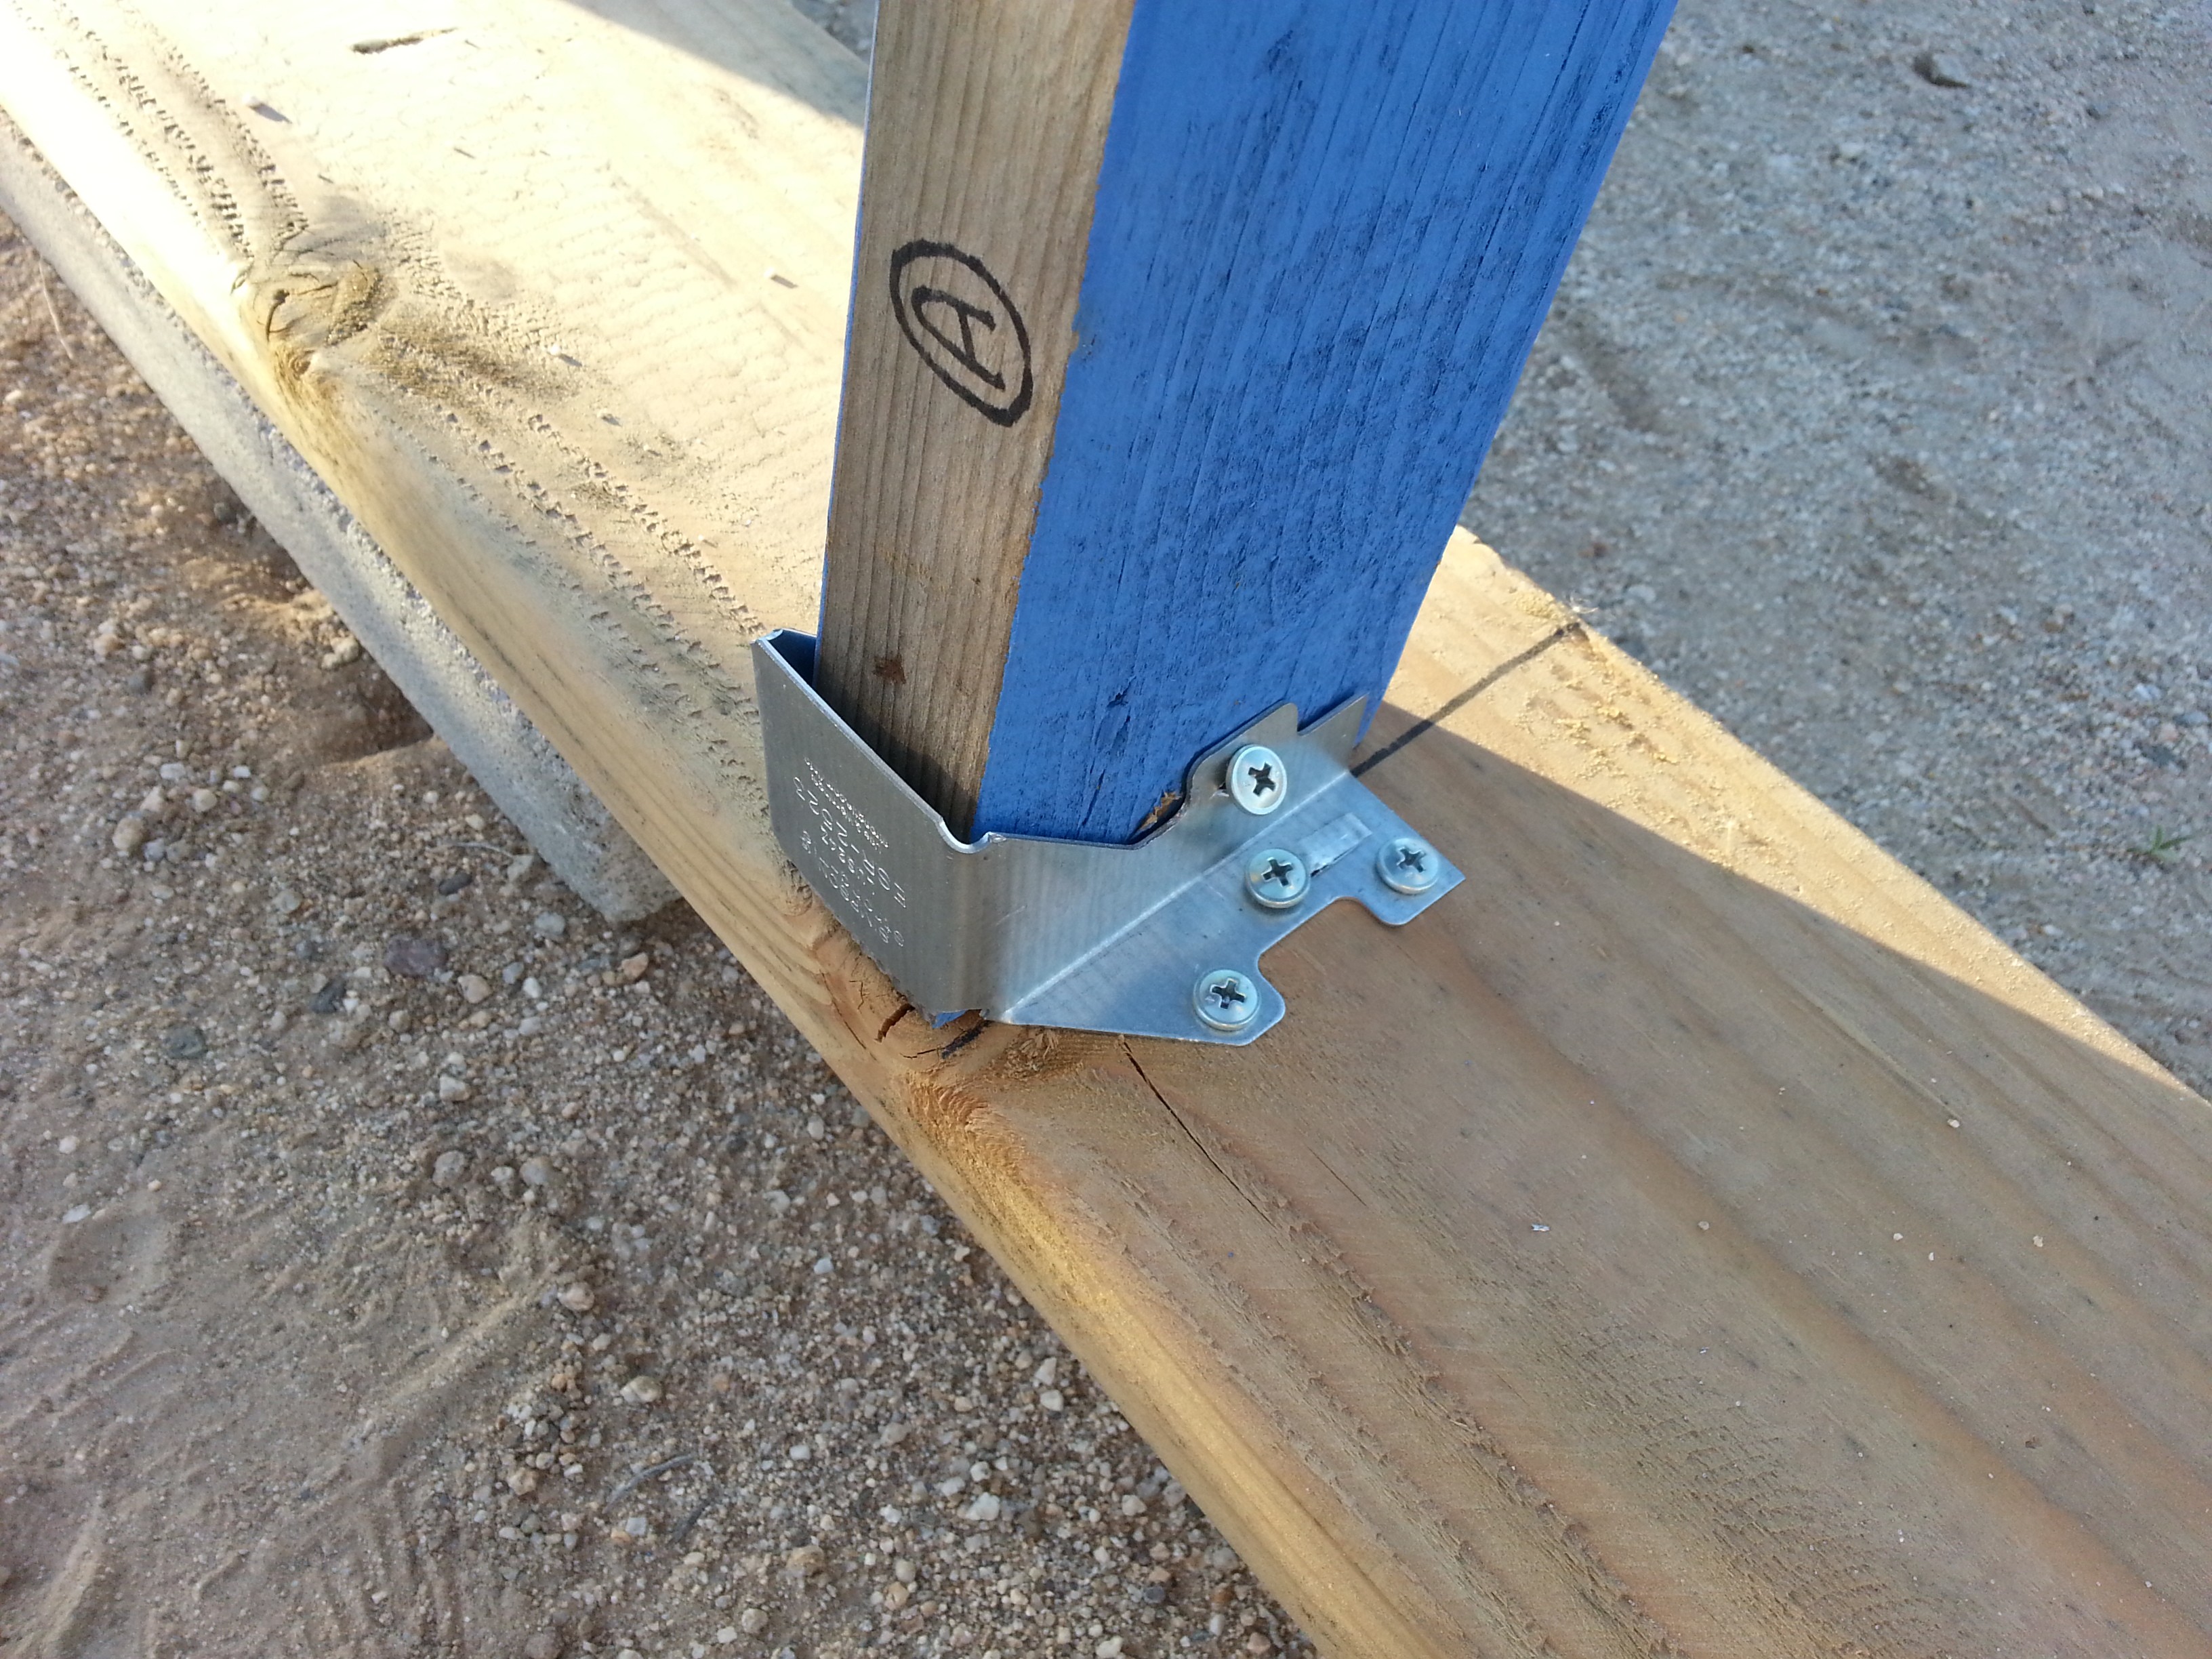
In keeping with the low budget and temporary approach, I came up with 2×6 sill plates which ‘float’ on concrete pavers as needed to hold them more or less level and the width of the building is secured by three 18′ 2×4 ‘spreaders’ which are bolted at each end to the sill plates. These spreaders also have blocks under them to hold them more or less level and not bowed down in the middle (which would shorten their overall length). This particular building shape wants to flatten out so the ‘spreaders’ keep that from happening. Eventually their function can be concealed within a wood floor frame or perhaps provided by steel cables buried under the sand floor or the sill plates themselves can be anchored to the ground in other ways.
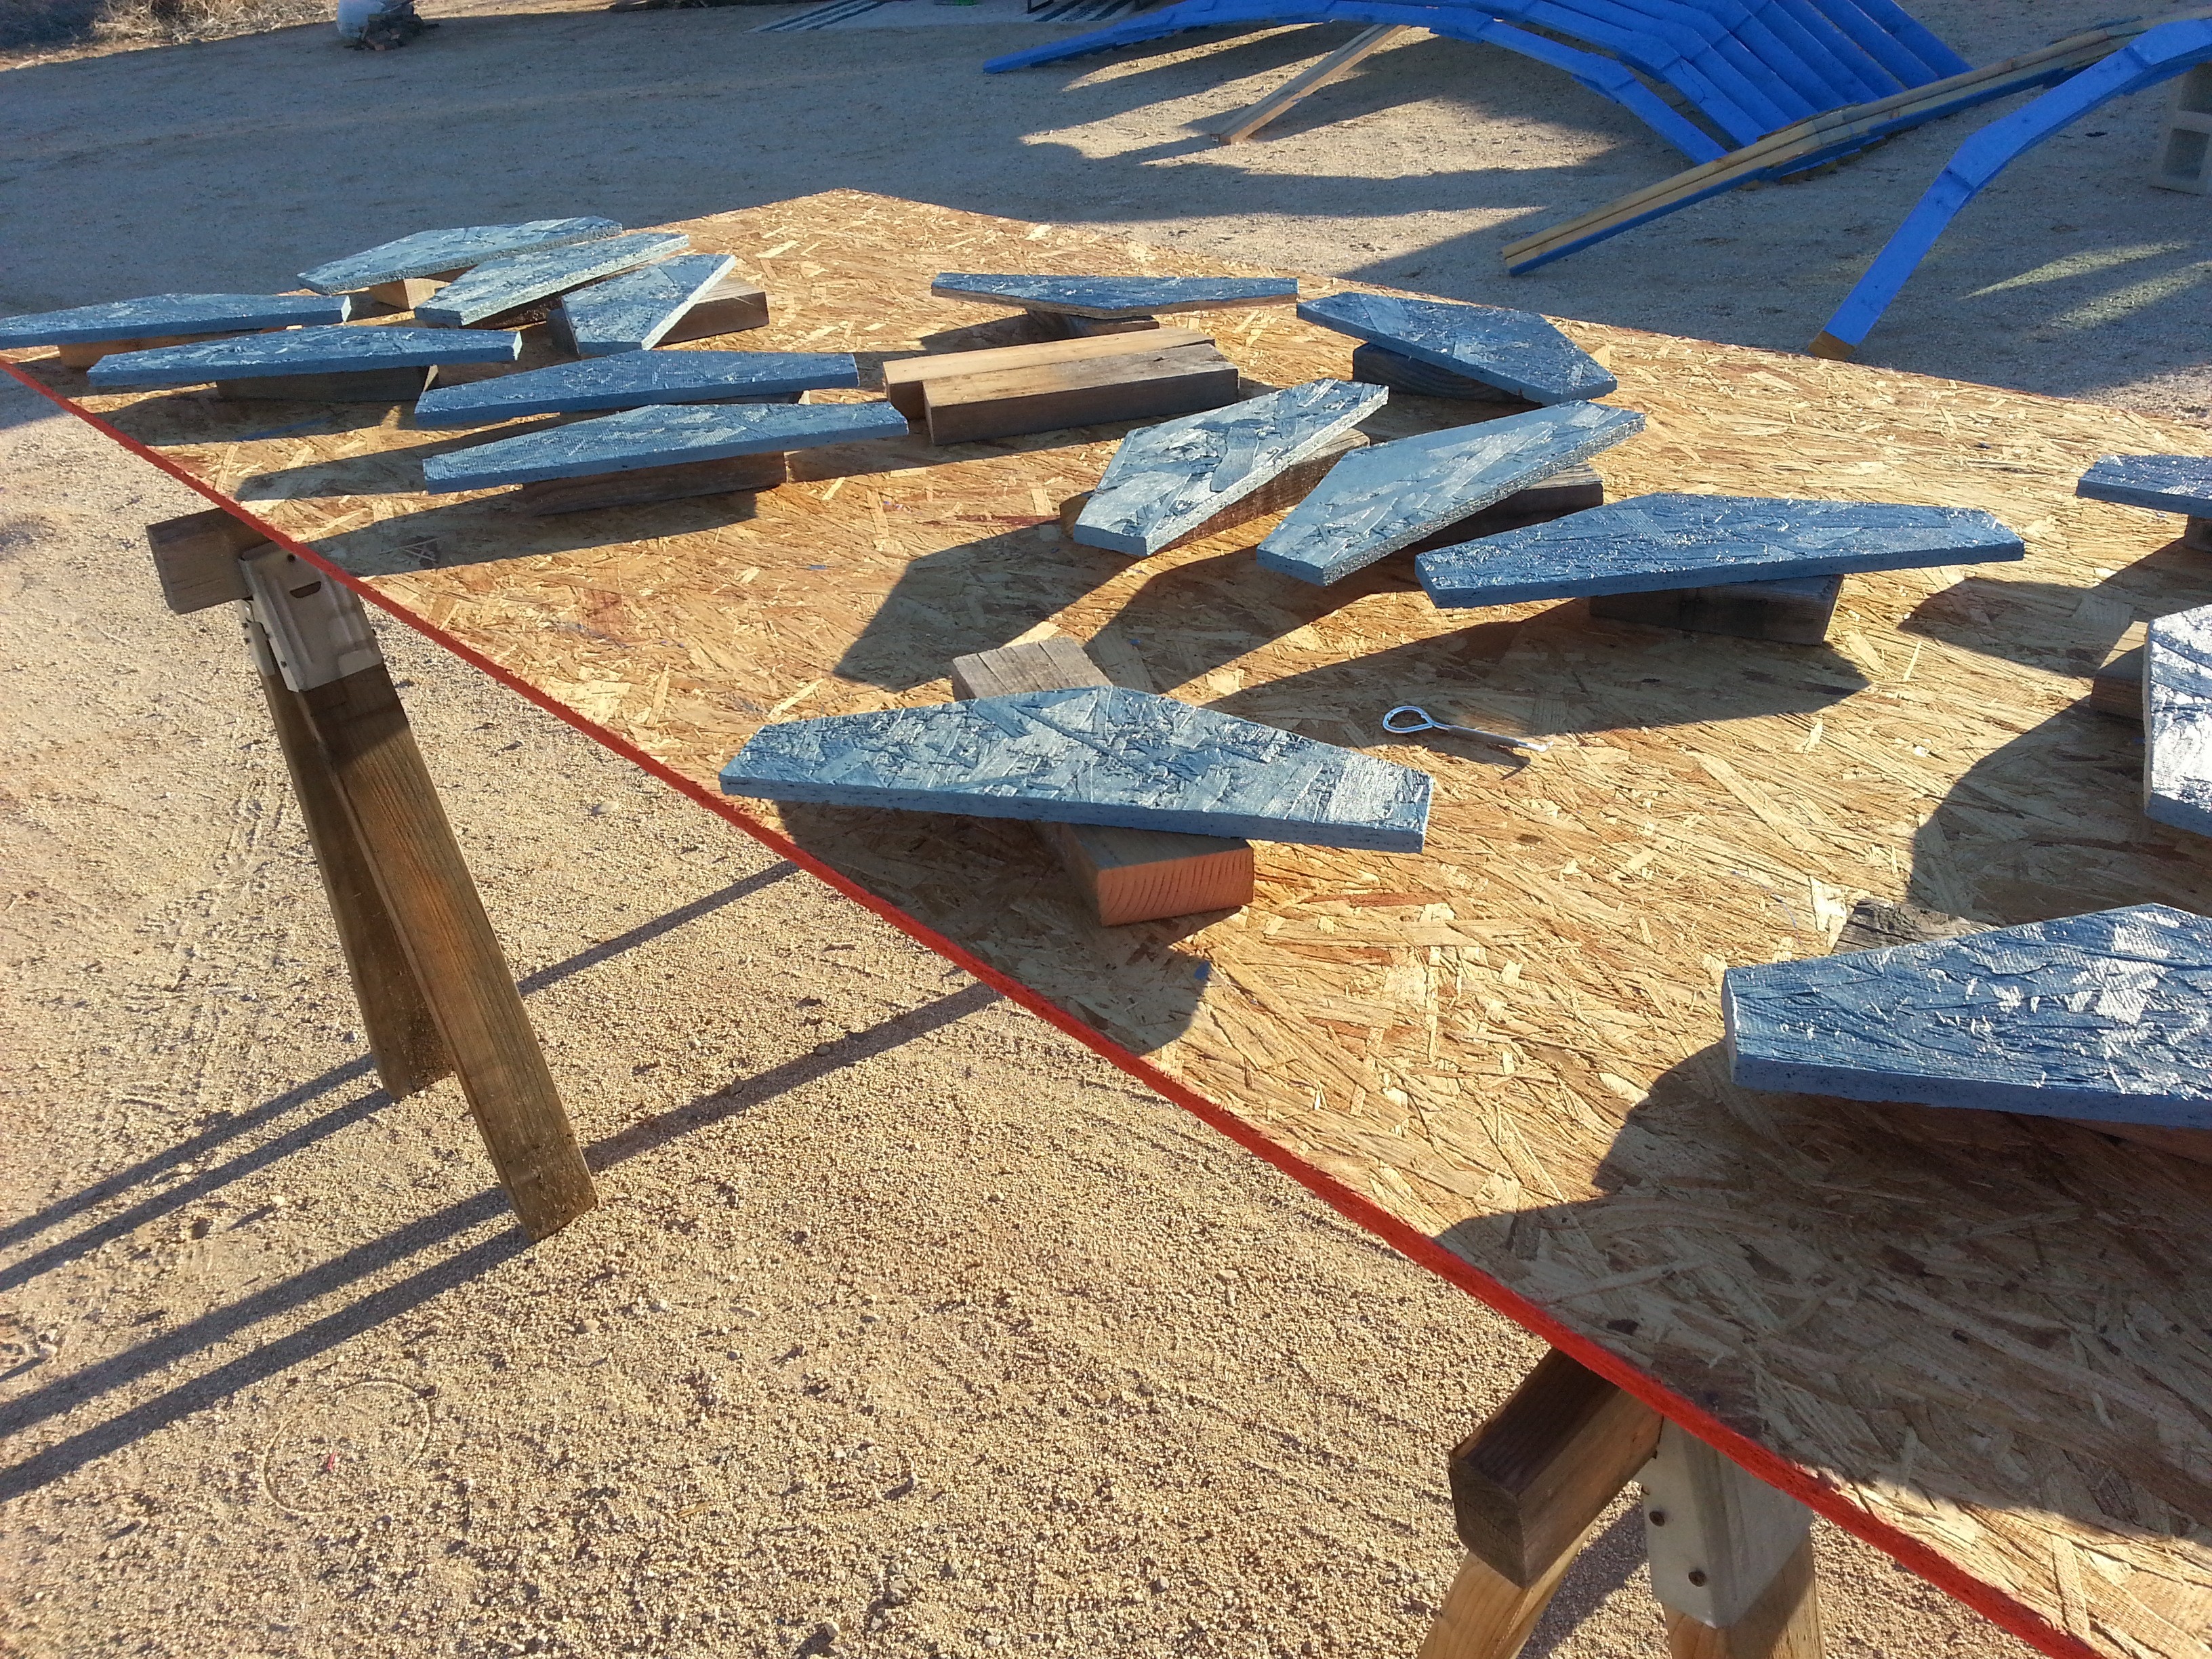
 Once the sills are in place, it’s a matter of joining two ribs together to form each arch using glue plates on both sides at the tallest part of the arch. With a plate on only one side, it’s a little flimsy so we have to carefully stand each arch up vertical and lay it back down to secure the top plate on the 2nd side. Once plates are secured on both sides, it’s less risky moving the large arches around. (I also used OSB scraps to cut my glue plates but 1/2″ plywood is a LOT stronger and more suitable for this application.) I used 2×4 joist hangers to secure the arches to the sill plates. Again, the shape of the joist hanger retains the legs of the arches in place and won’t let them spread and work their way off of the sill plate over time. I also built a ‘marriage wall’ using two arches at the midpoint which are held together with 20 5/16″ bolts and Tee nuts. If we ever want to move the building, we can remove those bolts, cut down through the sill plate (and up through the shingles), and move it as two smaller 8’x18′ sections. At this point it’s quite easy (using a 12′ 2×4 as a lever) to use blocks as a fulcrum and lift any portion of the sill plate a few inches. Once the weight of 16 more sheets of OSB and shingles are added, the leverage option likely won’t work as well.
 Once the marriage wall was up, I used four 8′ 2x3s to hold it vertical by bracing down at an angle to the sill plate. Then I added four more 8′ 2x3s horizontally to hold the additional arches on 24″ centers. As I install sheathing on any one facet, I remove one brace at a time to move the arches as needed to line up with the new sheathing, and then reinstall the horizontal brace if needed.
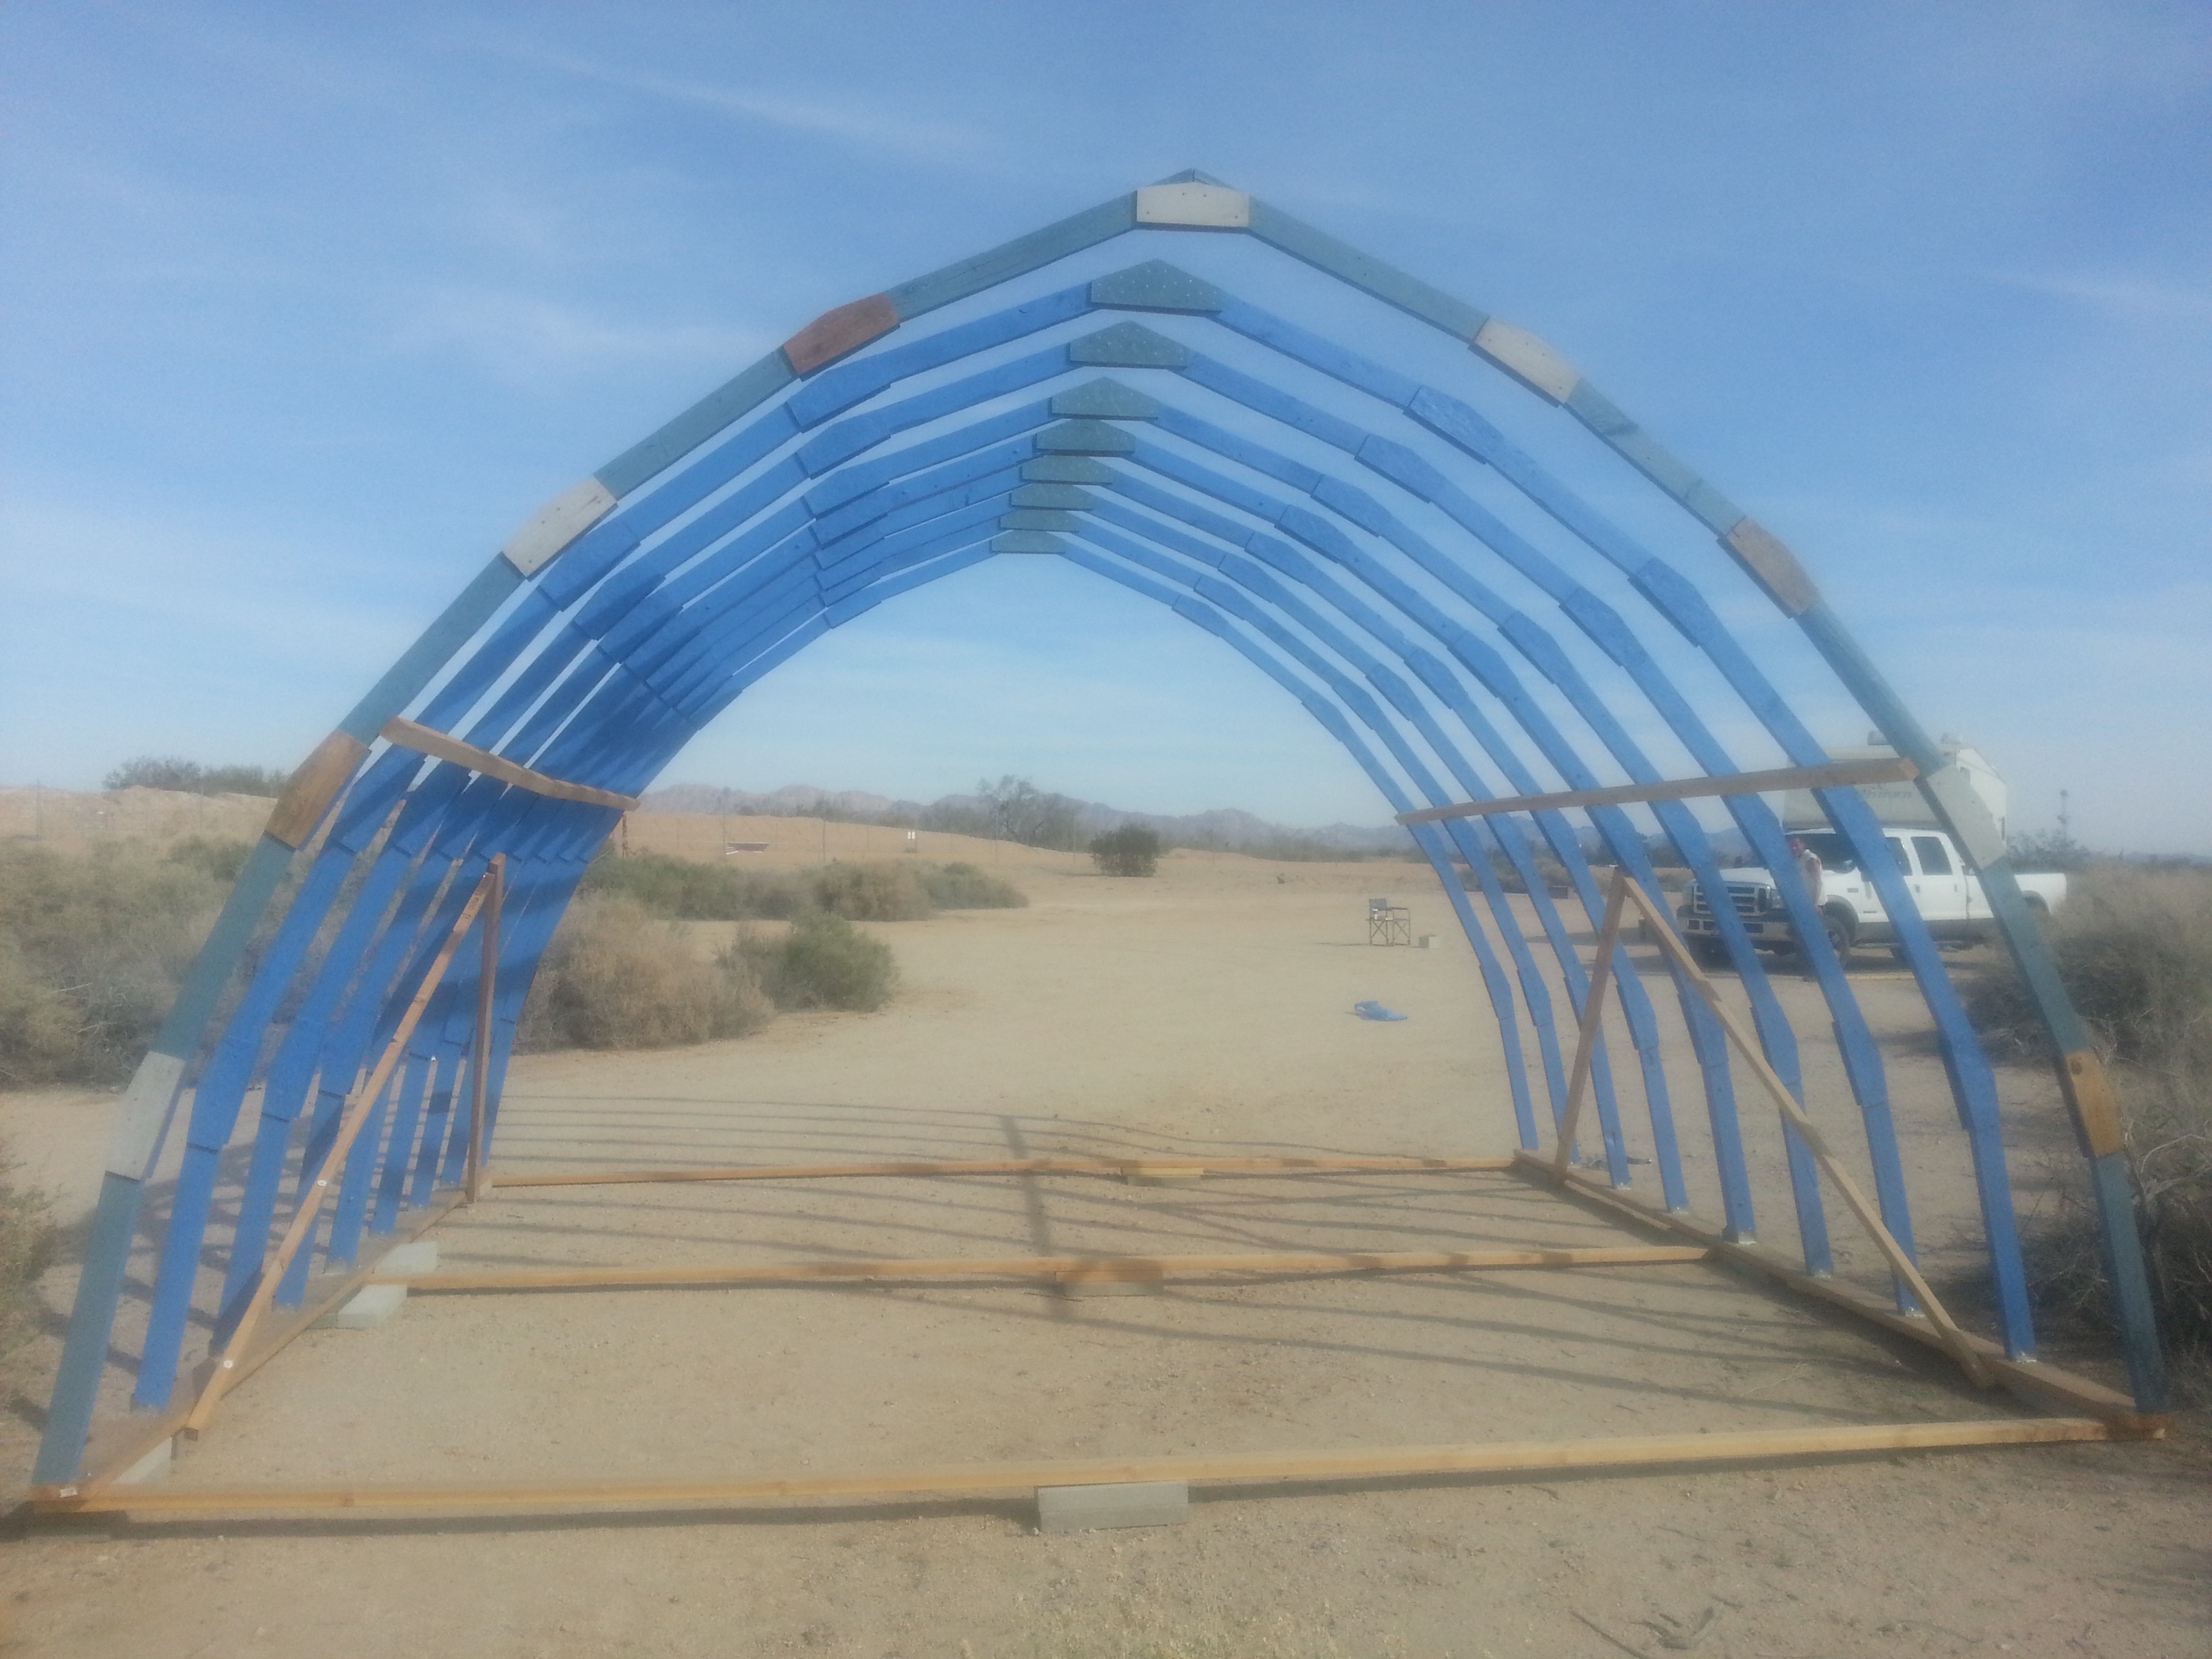
This first summer, only the lowest facet down both sides will have sheathing and the rest will be covered with two 12′ x 16′ heavy duty tarps. The joist hangers stick out a bit and I wanted the lowest sheathing to extend 2″ down to cover the outer edge of the sill plate *and* provide a drip edge below the sill plate (to keep it dry) so I cut 2″ x 4″ notches for the OSB to clear the joist hangers — a 2″ x 2″ square cut-out might have worked just as well and would have left the bottom edge more intact.
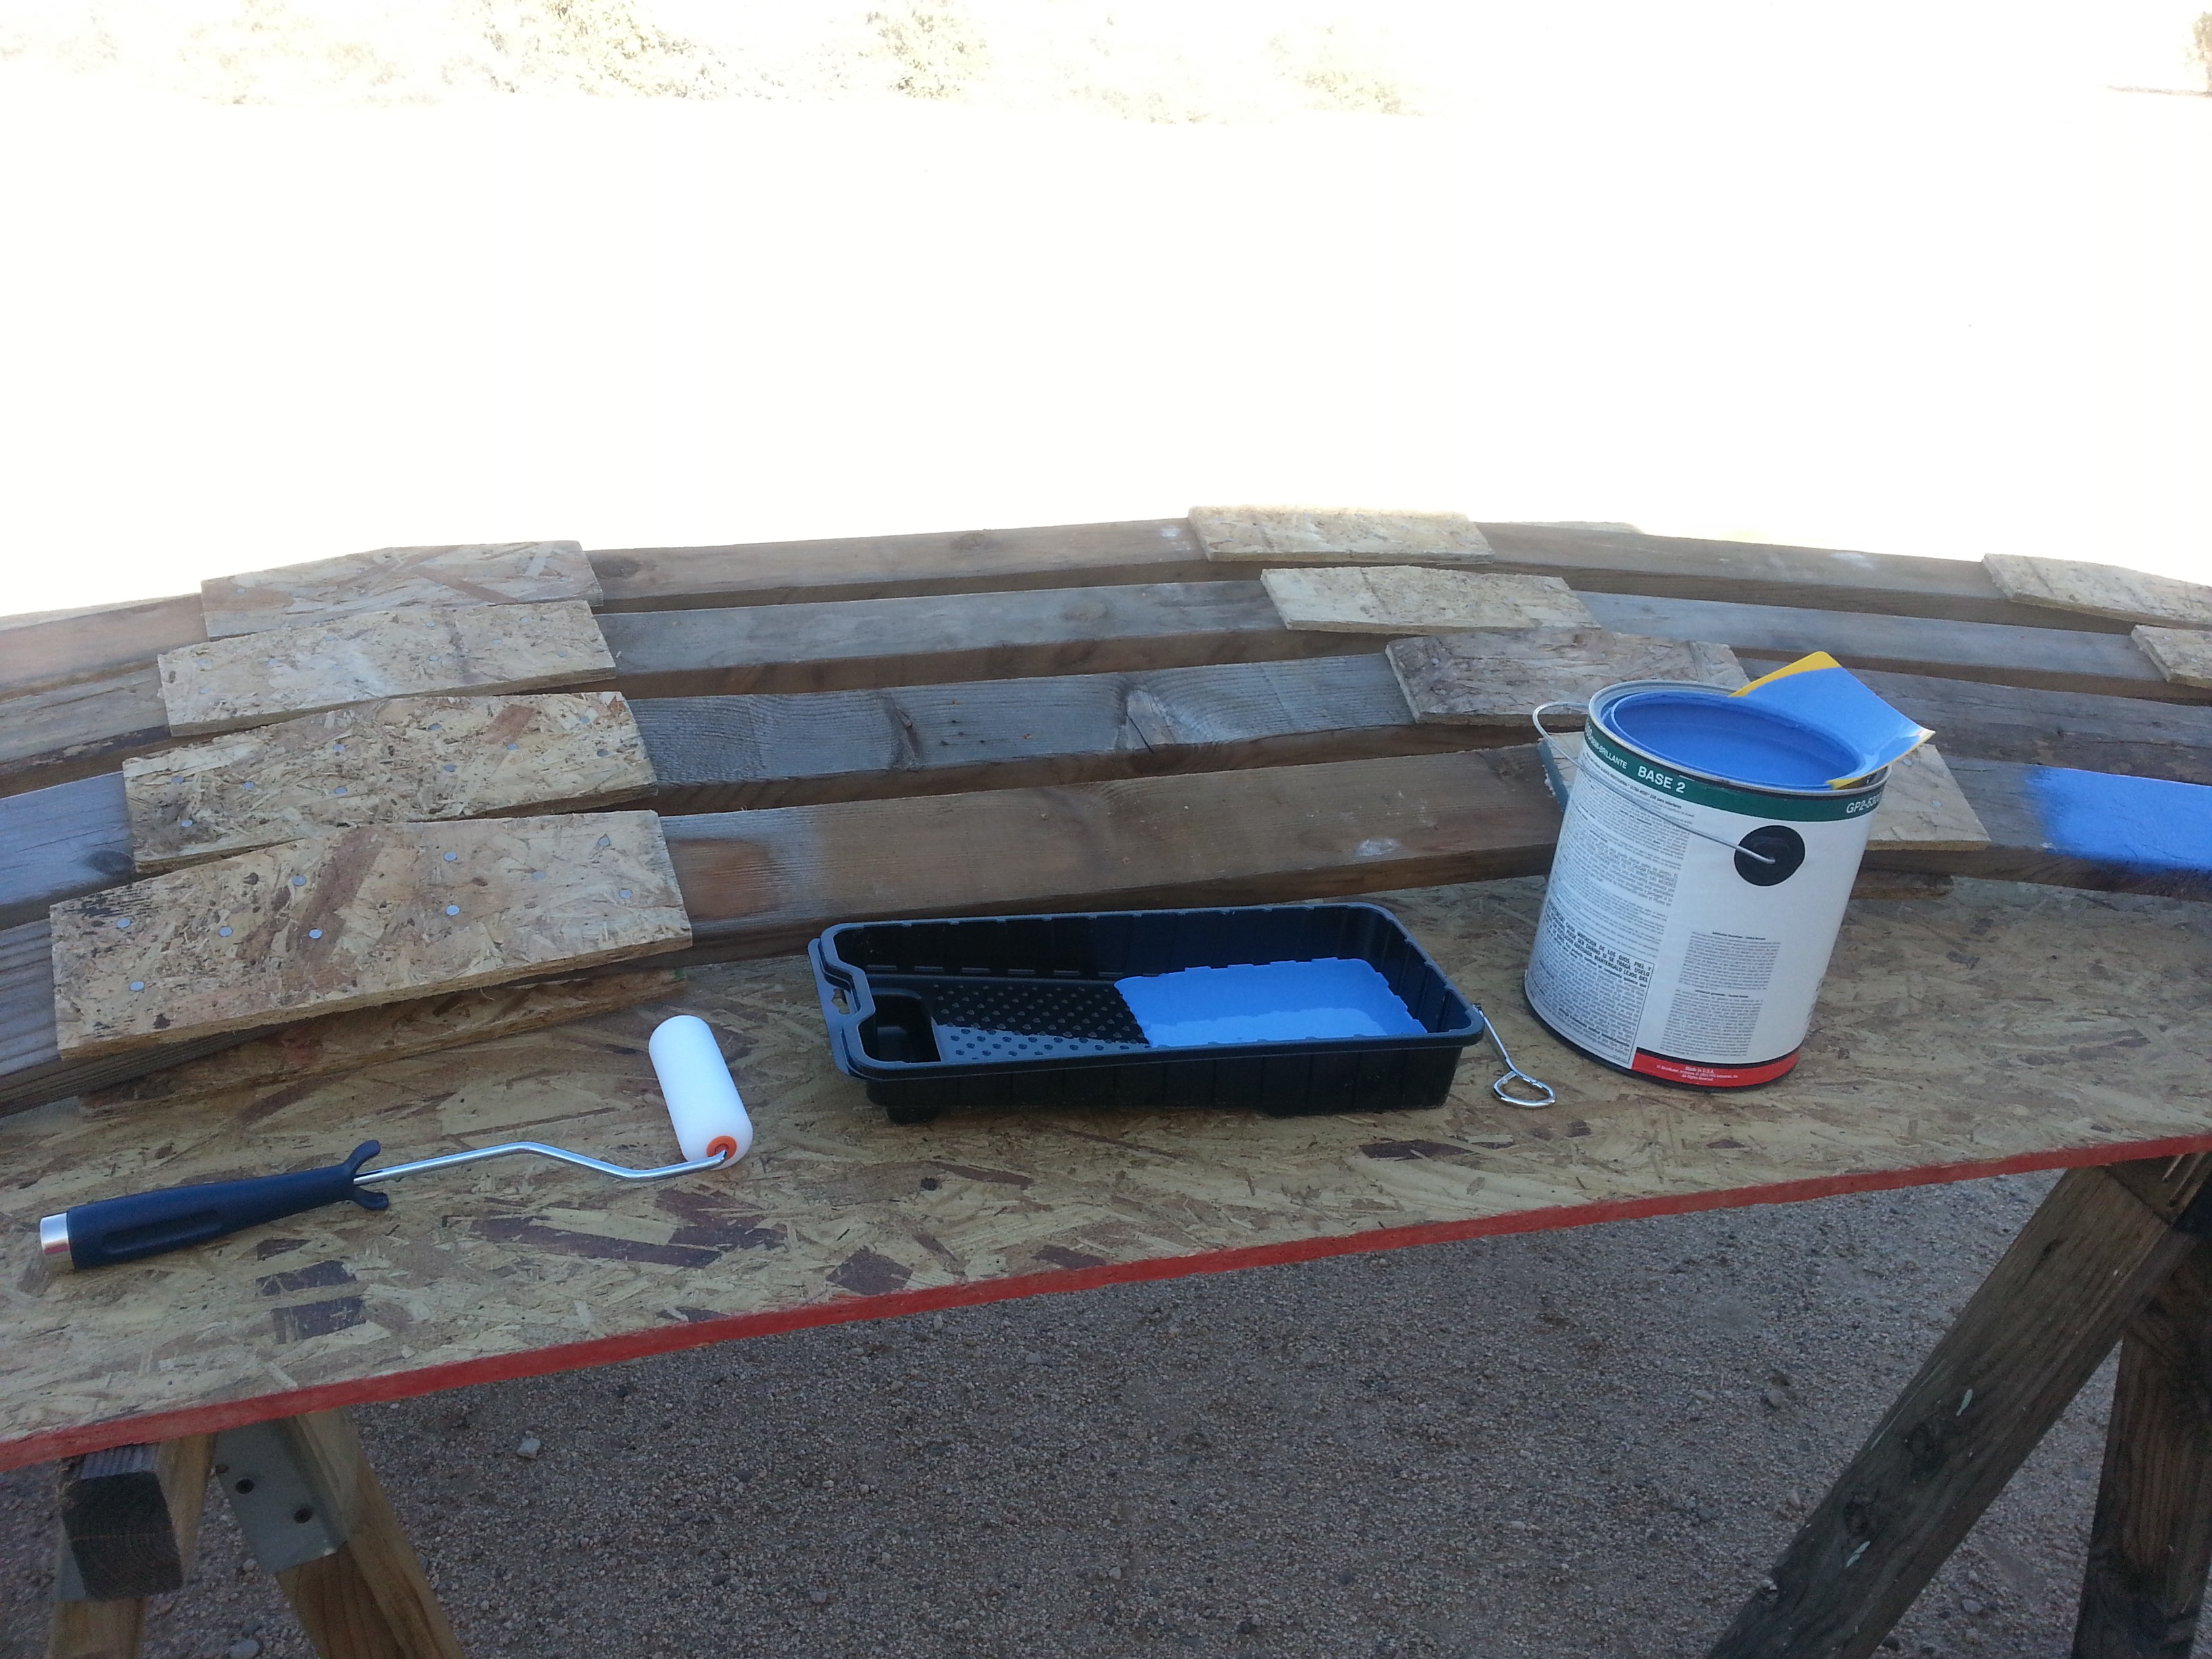
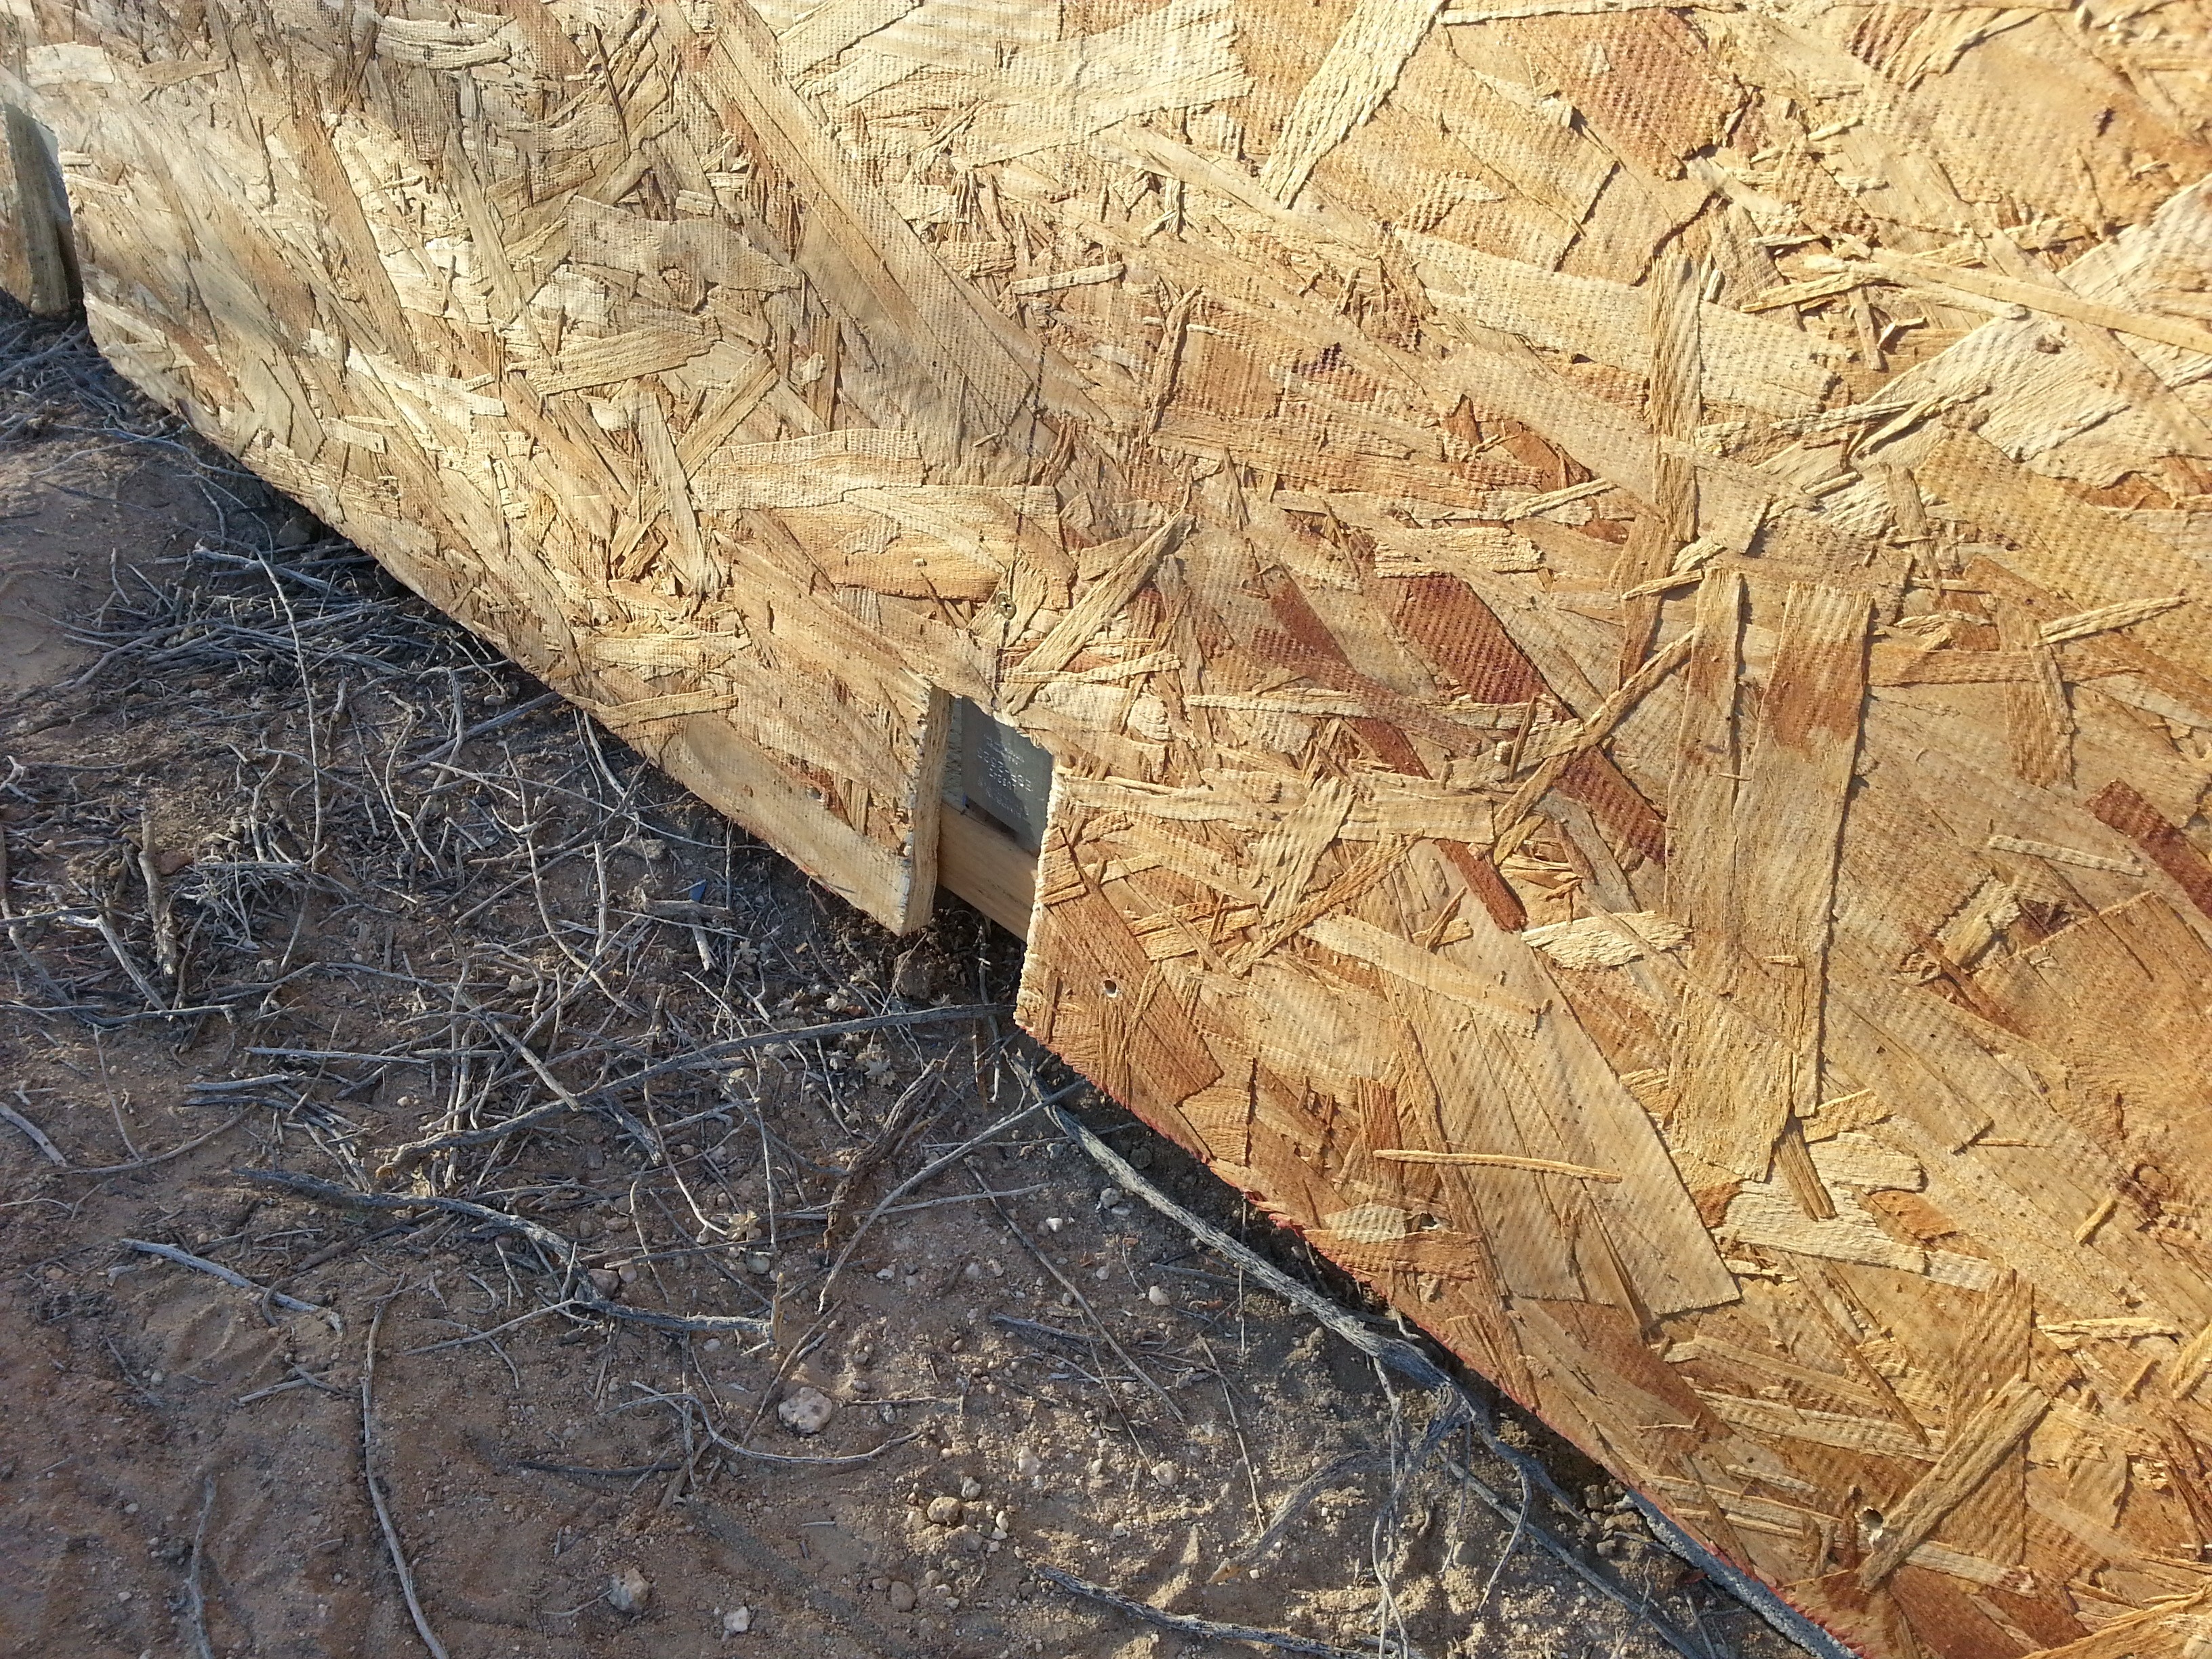 I installed the four sheets of OSB after pre-drilling where the screws and bottom row of nails would go (just to permit easier nailing along the bottom edge — at an angle into the outside edge of the sill plate). For each section, I pulled the horizontal brace off so I could align the arches properly on the sheathing and then reinstalled the brace so no more than one of the four braces was off at any point in time. The braces are installed on the inside so I can leave them in place under the tarps this first season. It will take another 16 sheets of OSB and five square (500 square feet) of shingles to finish the shell but it just wasn’t in the budget to take the building that far yet. We want to do some more hiking, mountain biking, and sightseeing this spring before we head ‘home’ to the great northwest for the summer months. To protect the exposed OSB until we get back, we used a 2nd gallon of mis-matched exterior paint we got for $8. It’s more about protecting the wood and our time investment at this point so we don’t care so much about the color. The painted sheathing will eventually be covered up with roofing anyway.

 Now that we’re near a stopping point on this project, I find myself suddenly concerned about unauthorized use or damage to our carefully constructed shelter. I want to build a temporary fence across both open ends — using materials we can re-purpose to some more profitable application in the future.
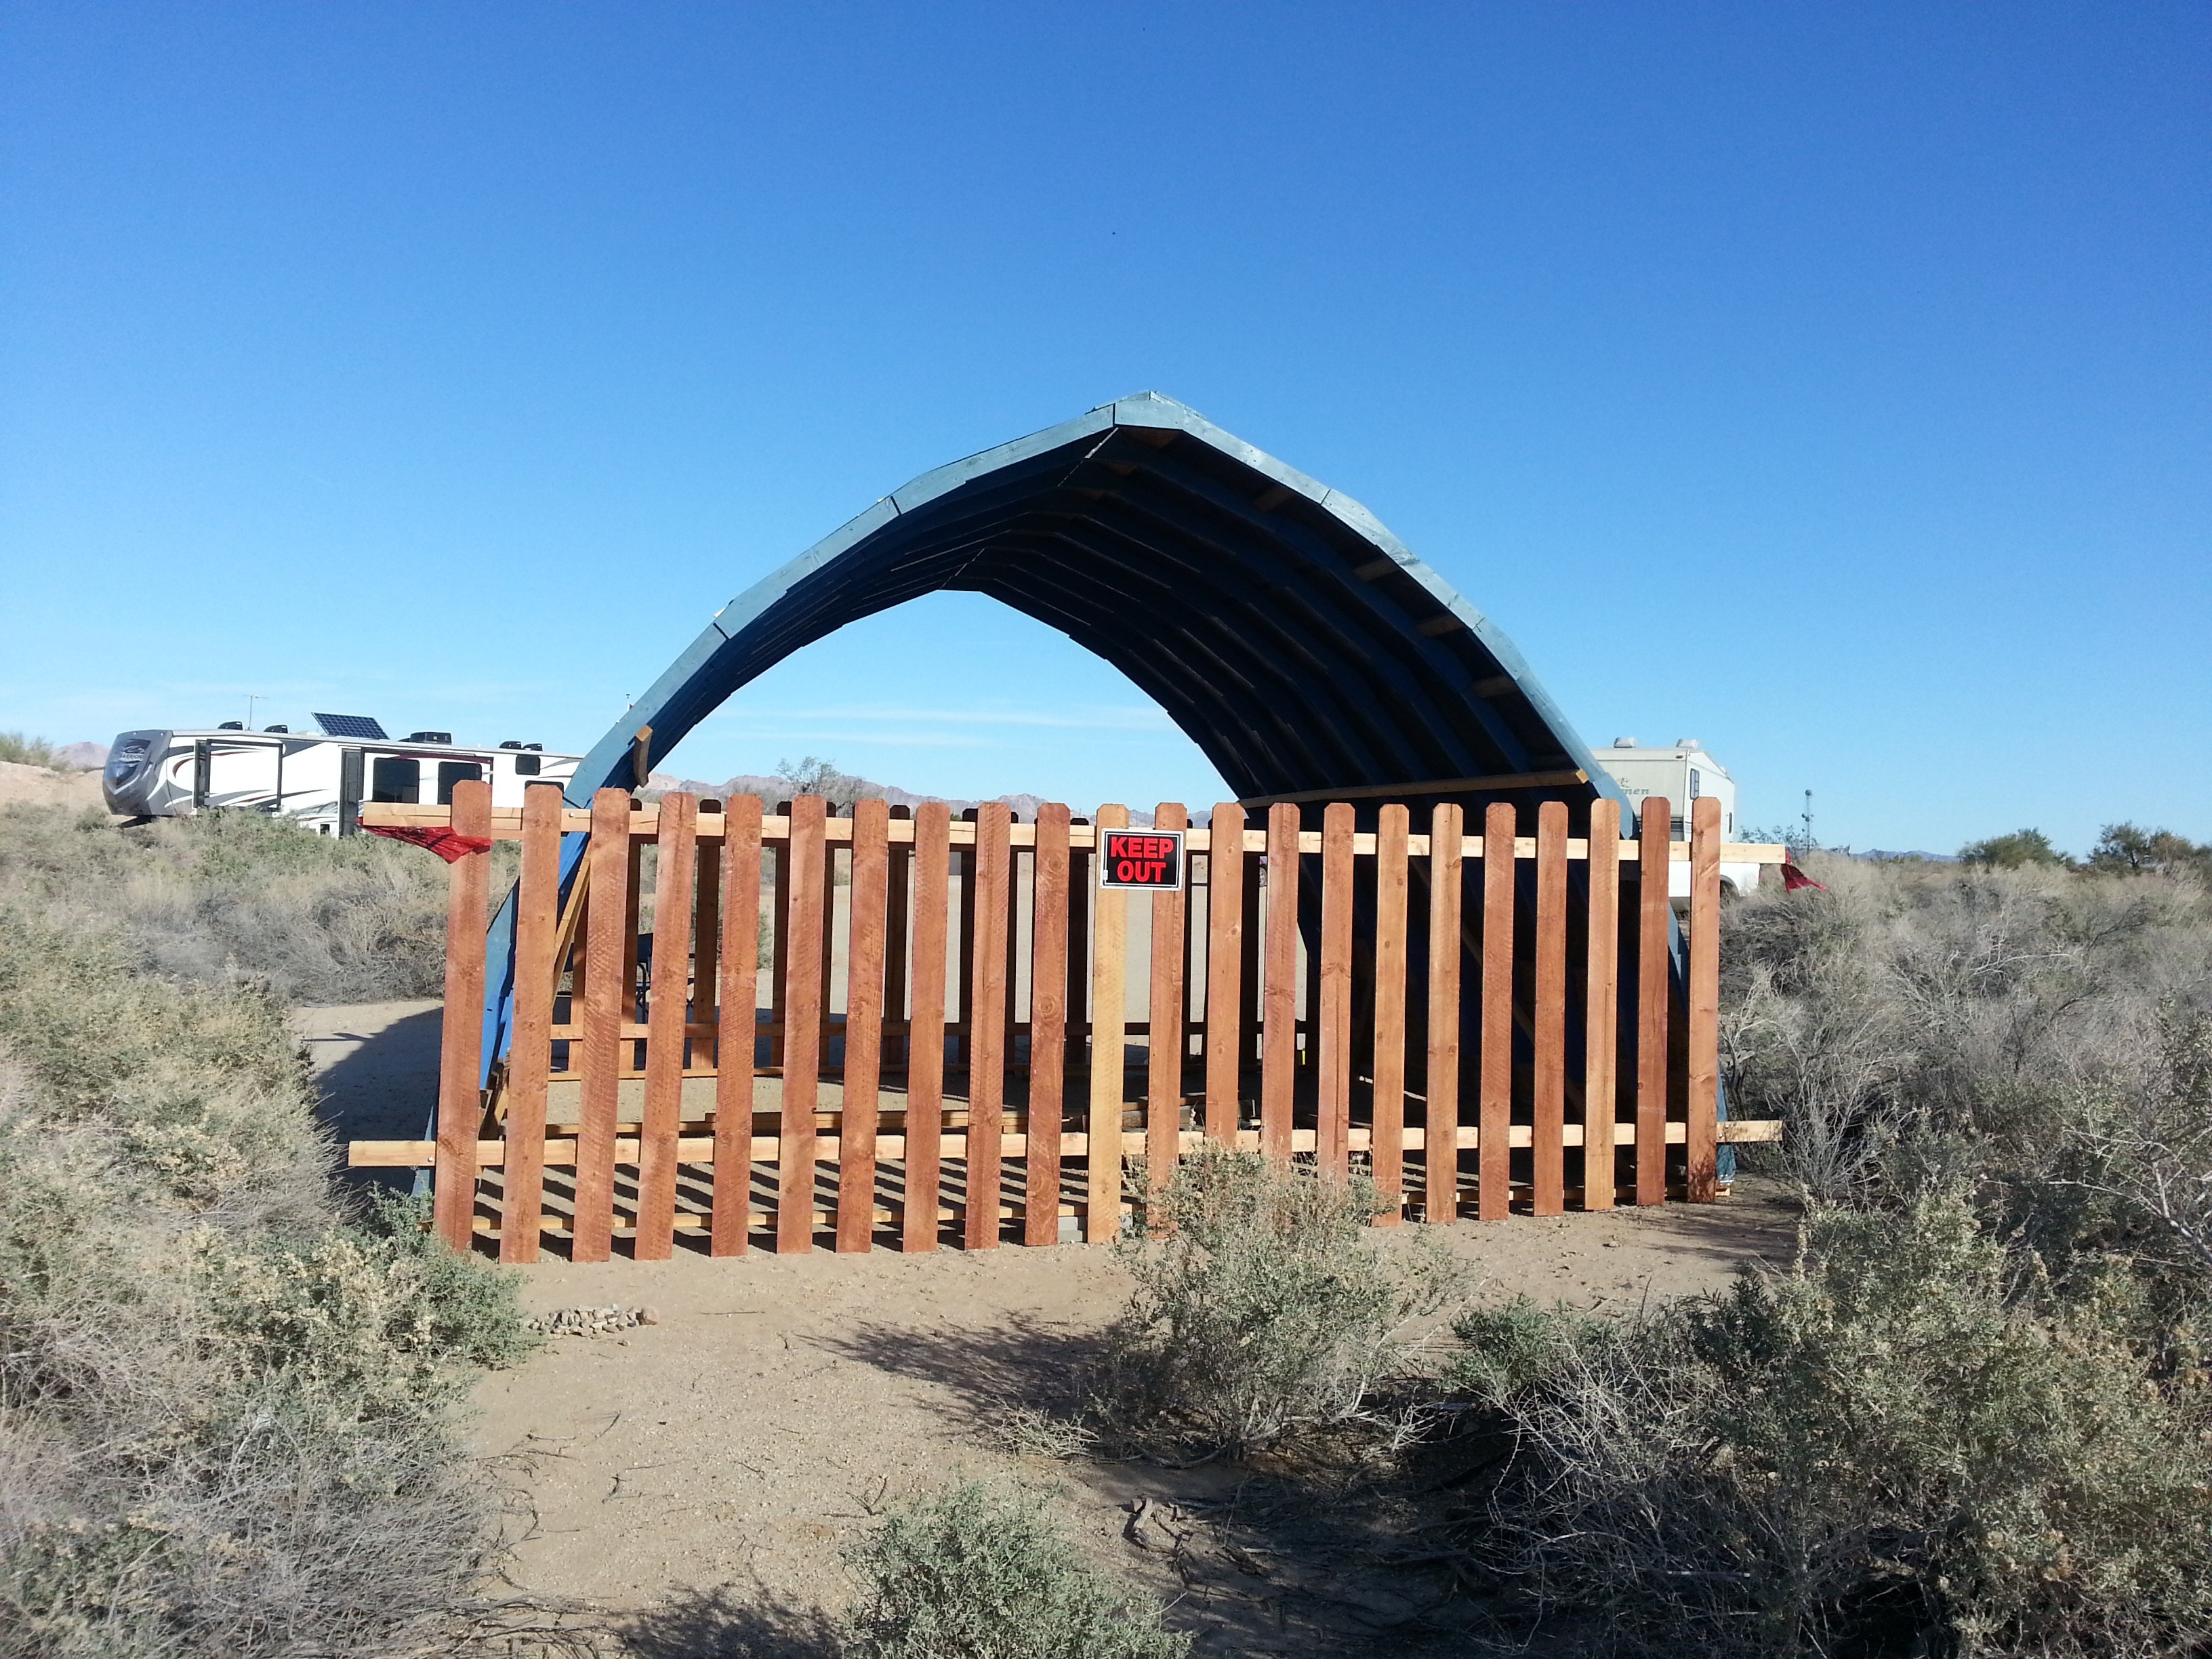 So this is how we’re leaving it this spring of 2017. Hopefully it won’t blow over or catch fire between now and our return in November 🙂 What do you think about building something like this in the middle of a TAZ (Temporary Autonomous Zone) where there are no rulers, no landlords — no property ‘owners’ to care? And where the usual rules of property ‘ownership’ don’t apply?


Looks good Jim, as always, and very spacious. You are always so carefull to do the planning, and have the forethought to do it under budget. Are you going to use it as a warehouse or live in there. Thanks for posting, always good to see what you are doing, and how you are .
Thanks for the compliments my friend! The original idea was to build smaller storage sheds, etc. out of The Barn — something I could sell — maybe even make a buck or two 🙂 Mostly I just really needed something to do *and* I had all those materials so it felt good to put them to some productive use. Once it is further along, there is a good chance we could rent it out by the night when we’re not there via air bnb. You might be surprised to see how many of these there are = 300+ in the Boise area — 163 of ’em less than $51 a night — can’t get much of a motel room for that anymore 🙂
https://www.airbnb.com/s/Boise–ID–United-States?guests=1&adults=1&children=0&infants=0&place_id=ChIJnbRH6XLxrlQRm51nNpuYW5o&ss_id=2ho1qw6n&source=bb&page=1&allow_override%5B%5D=&price_max=51&s_tag=VgGyU7dF
And here are the ones (only ten so far) at The Slabs and nearby Niland, CA:
https://www.airbnb.com/s/Niland–CA–United-States?guests=1&adults=1&children=0&infants=0&place_id=ChIJZ21wN8mt0IAR2Gy8Yp2buOA&source=bb&page=1&allow_override%5B%5D=&price_max=51&s_tag=UU0hWPxn
The ones shown as “California Ponderosa” are just a stone’s throw from The Barn — operated by our friend George. The barn is 300 square feet and 12′ tall — four twin-size bunks (with my tools and materials locked securely underneath) could be a lot of fun for the right group. 🙂
==========
With air bnb all money changes hands online and goes direct into your account. If you have someone there while you’re gone, they usually do a 50/50 split on the revenue and air bnb handles all the details. Even as it is, it would be a hoot for 2 or 3 guys on bikes (pedal or otherwise). So we’ll see — no particular agenda — living FREE (or at very low cost) and looking forward to our next sunset. Today we took our bikes out for a while. We’ll be back in the Boise area by the end of May — looking forward to our next lunch together and catching up! Later my good friend, JIM
==========
Cool place to meditate or do yoga!
Thanks Shawn for your comment. My daughter co-owns a Hot Yoga studio in Portland. There at The Slabs, no extra heat would be needed 🙂