A while back I made this note:
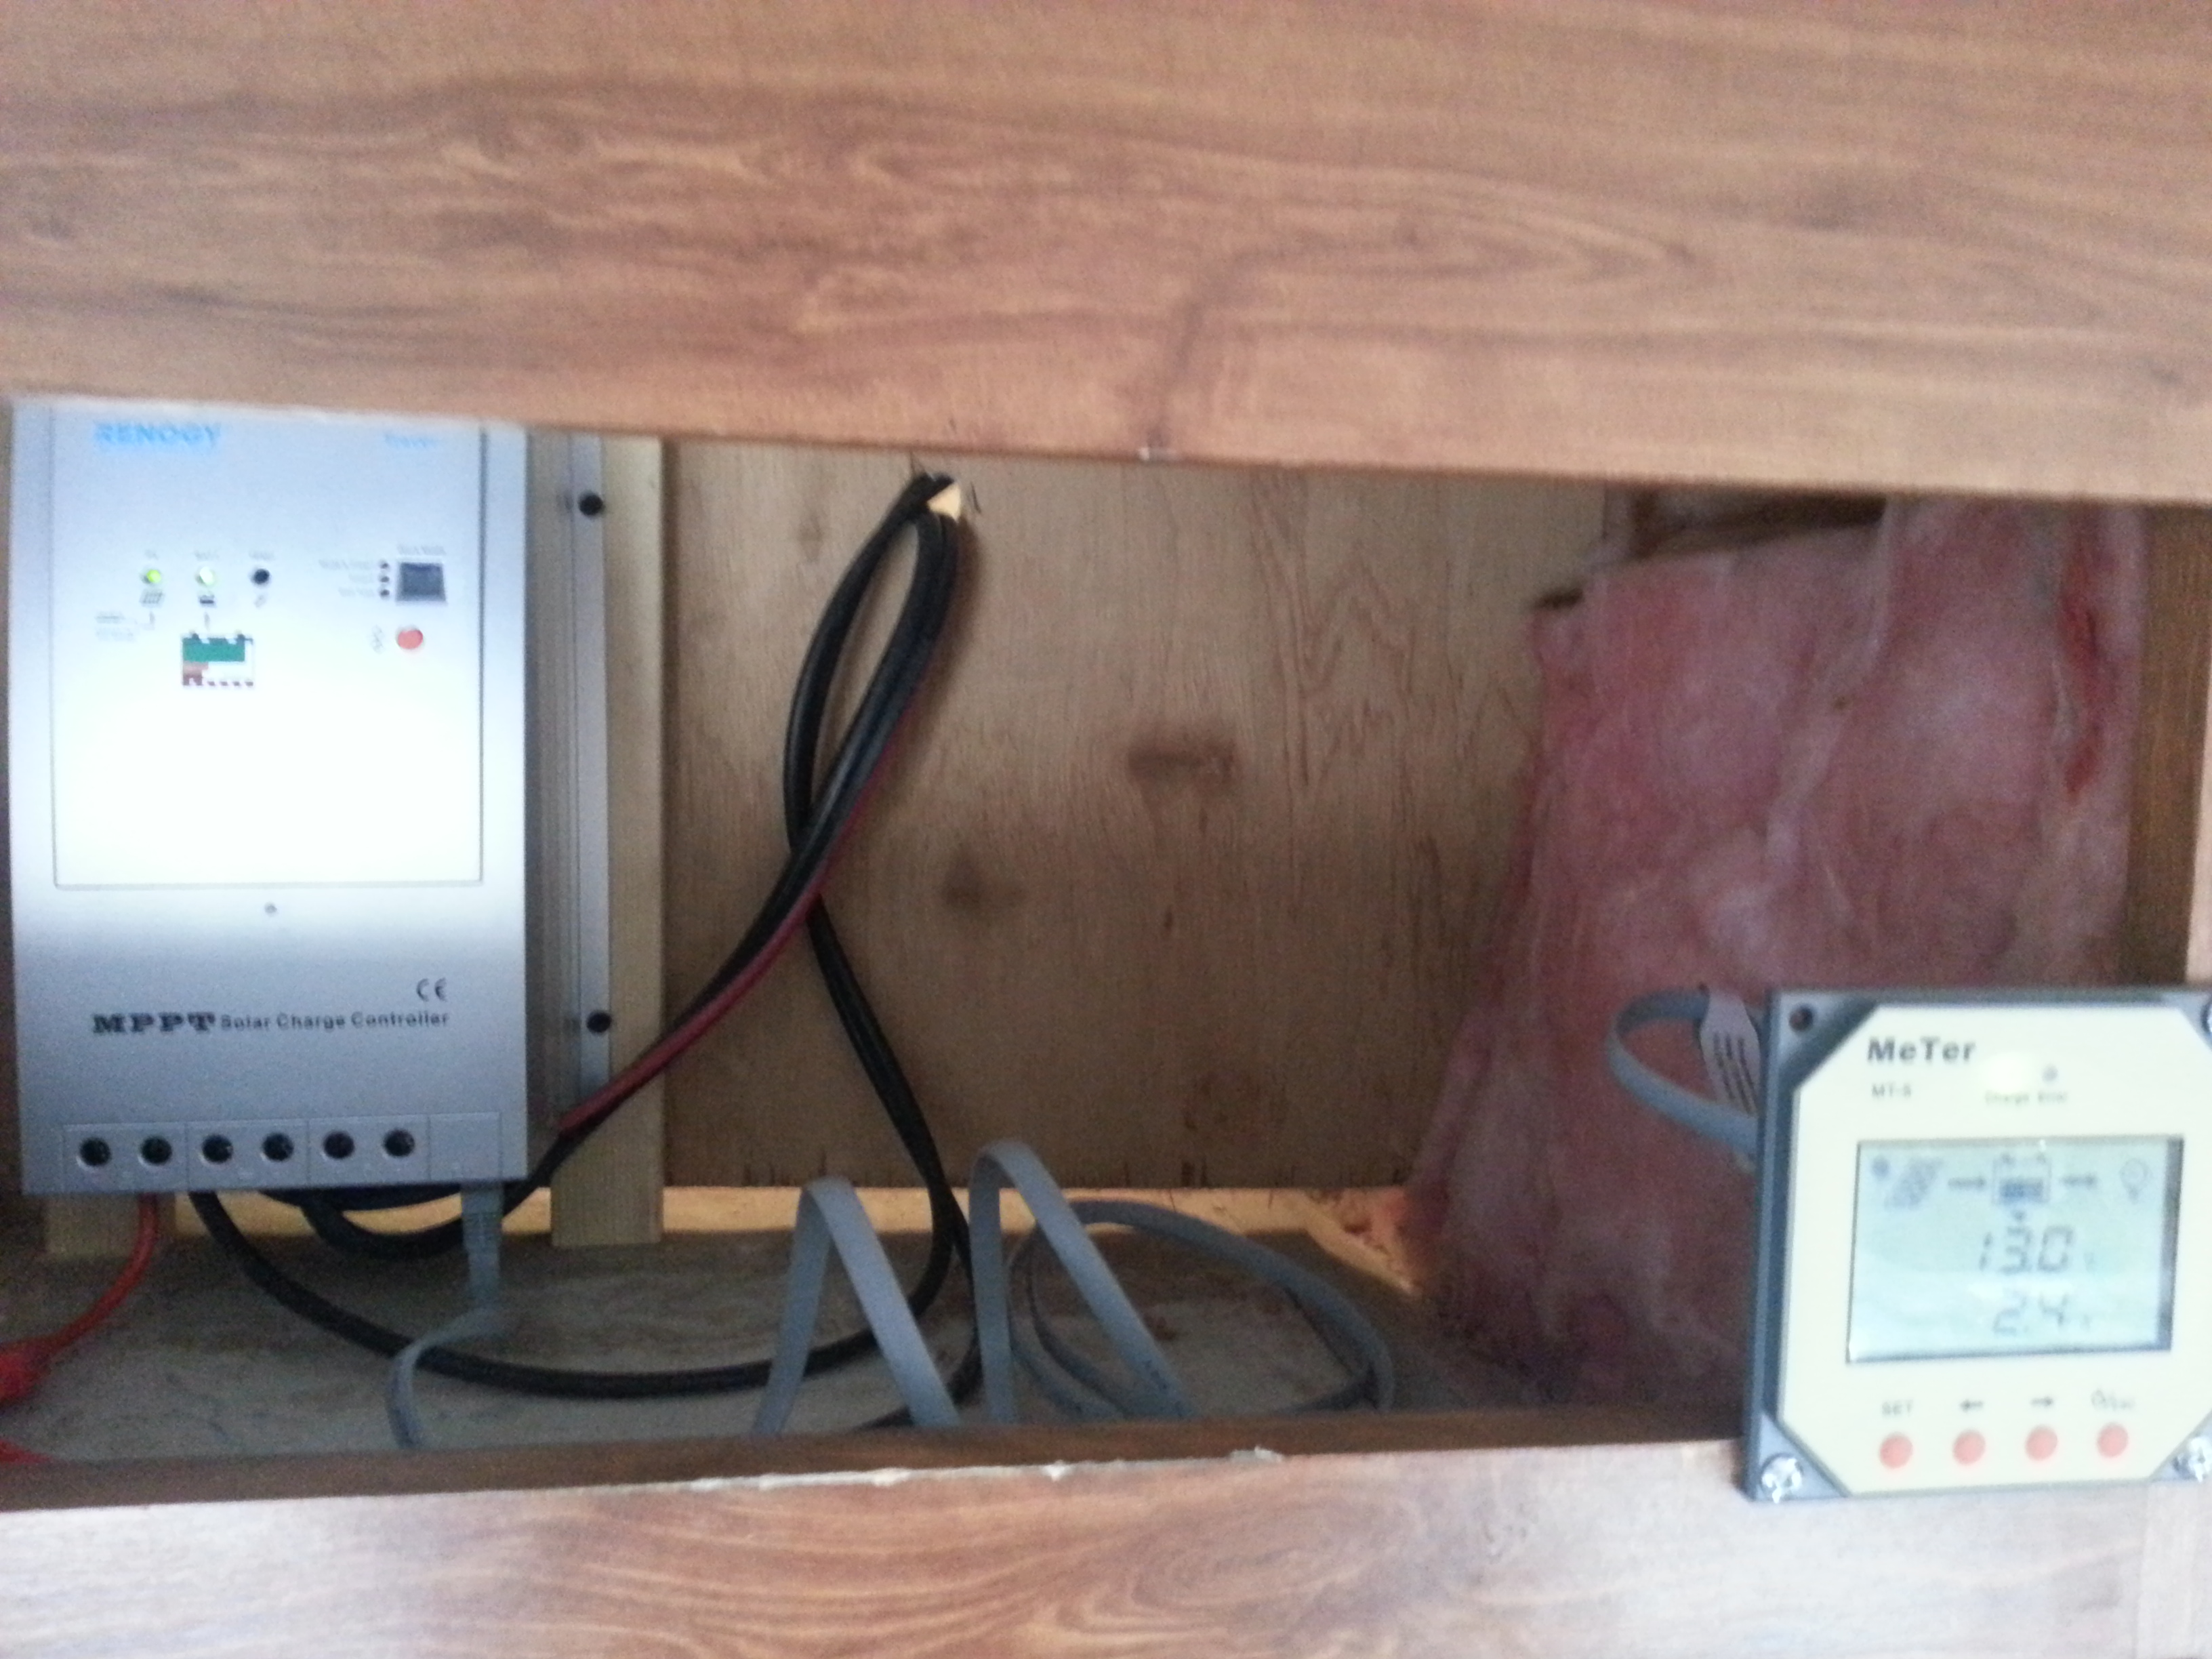
“I’m still doing my research and scoping out the install; compiling a short list of ‘improvements’ I want to make. One of them is that the large fins on the back of the charge controller are in a now-wide-open enclosure above our reefer, but the fins (as installed) are horizontal *and* the controller is up tight against the ceiling. Common sense — and the owner’s manual — requires 150 mm (5.9 inches!) above and below the controller to allow for cooling. The enclosure it is in is 28″ wide, 13-1/4″ deep but only 14″ tall (at best and slopes shorter from there) and the controller is 9-1/2″ tall. This means I can only leave less than 2” above and below the controller for cooling = not ideal but certainly much better than being jammed tight up against the ceiling as it is now. The cooling fins are currently so HOT that I can’t leave my fingers on them (frowny face) and I can smell some plastic components “curing” . . . I’m thinking not good!”
So I dove into the charge controller remount today to learn that only one of two screws was even installed into that 1″ x 1″ board up next to the ceiling — which was the whole reason he mounted it that way to begin with — some people’s kids! :o) The bottom ends of the vertical 1x2s I added aren’t attached to anything but they do rest on the top of the reefer enclosure for support. Turns out there was already a good 1″ of clearance between the fins and any solid surface the controller might be attached to, so the 3/4″ clearance I added by mounting it this way likely doesn’t make that much difference, but I’m sure the charge controller will operate *much* cooler. This is what it looks like now:
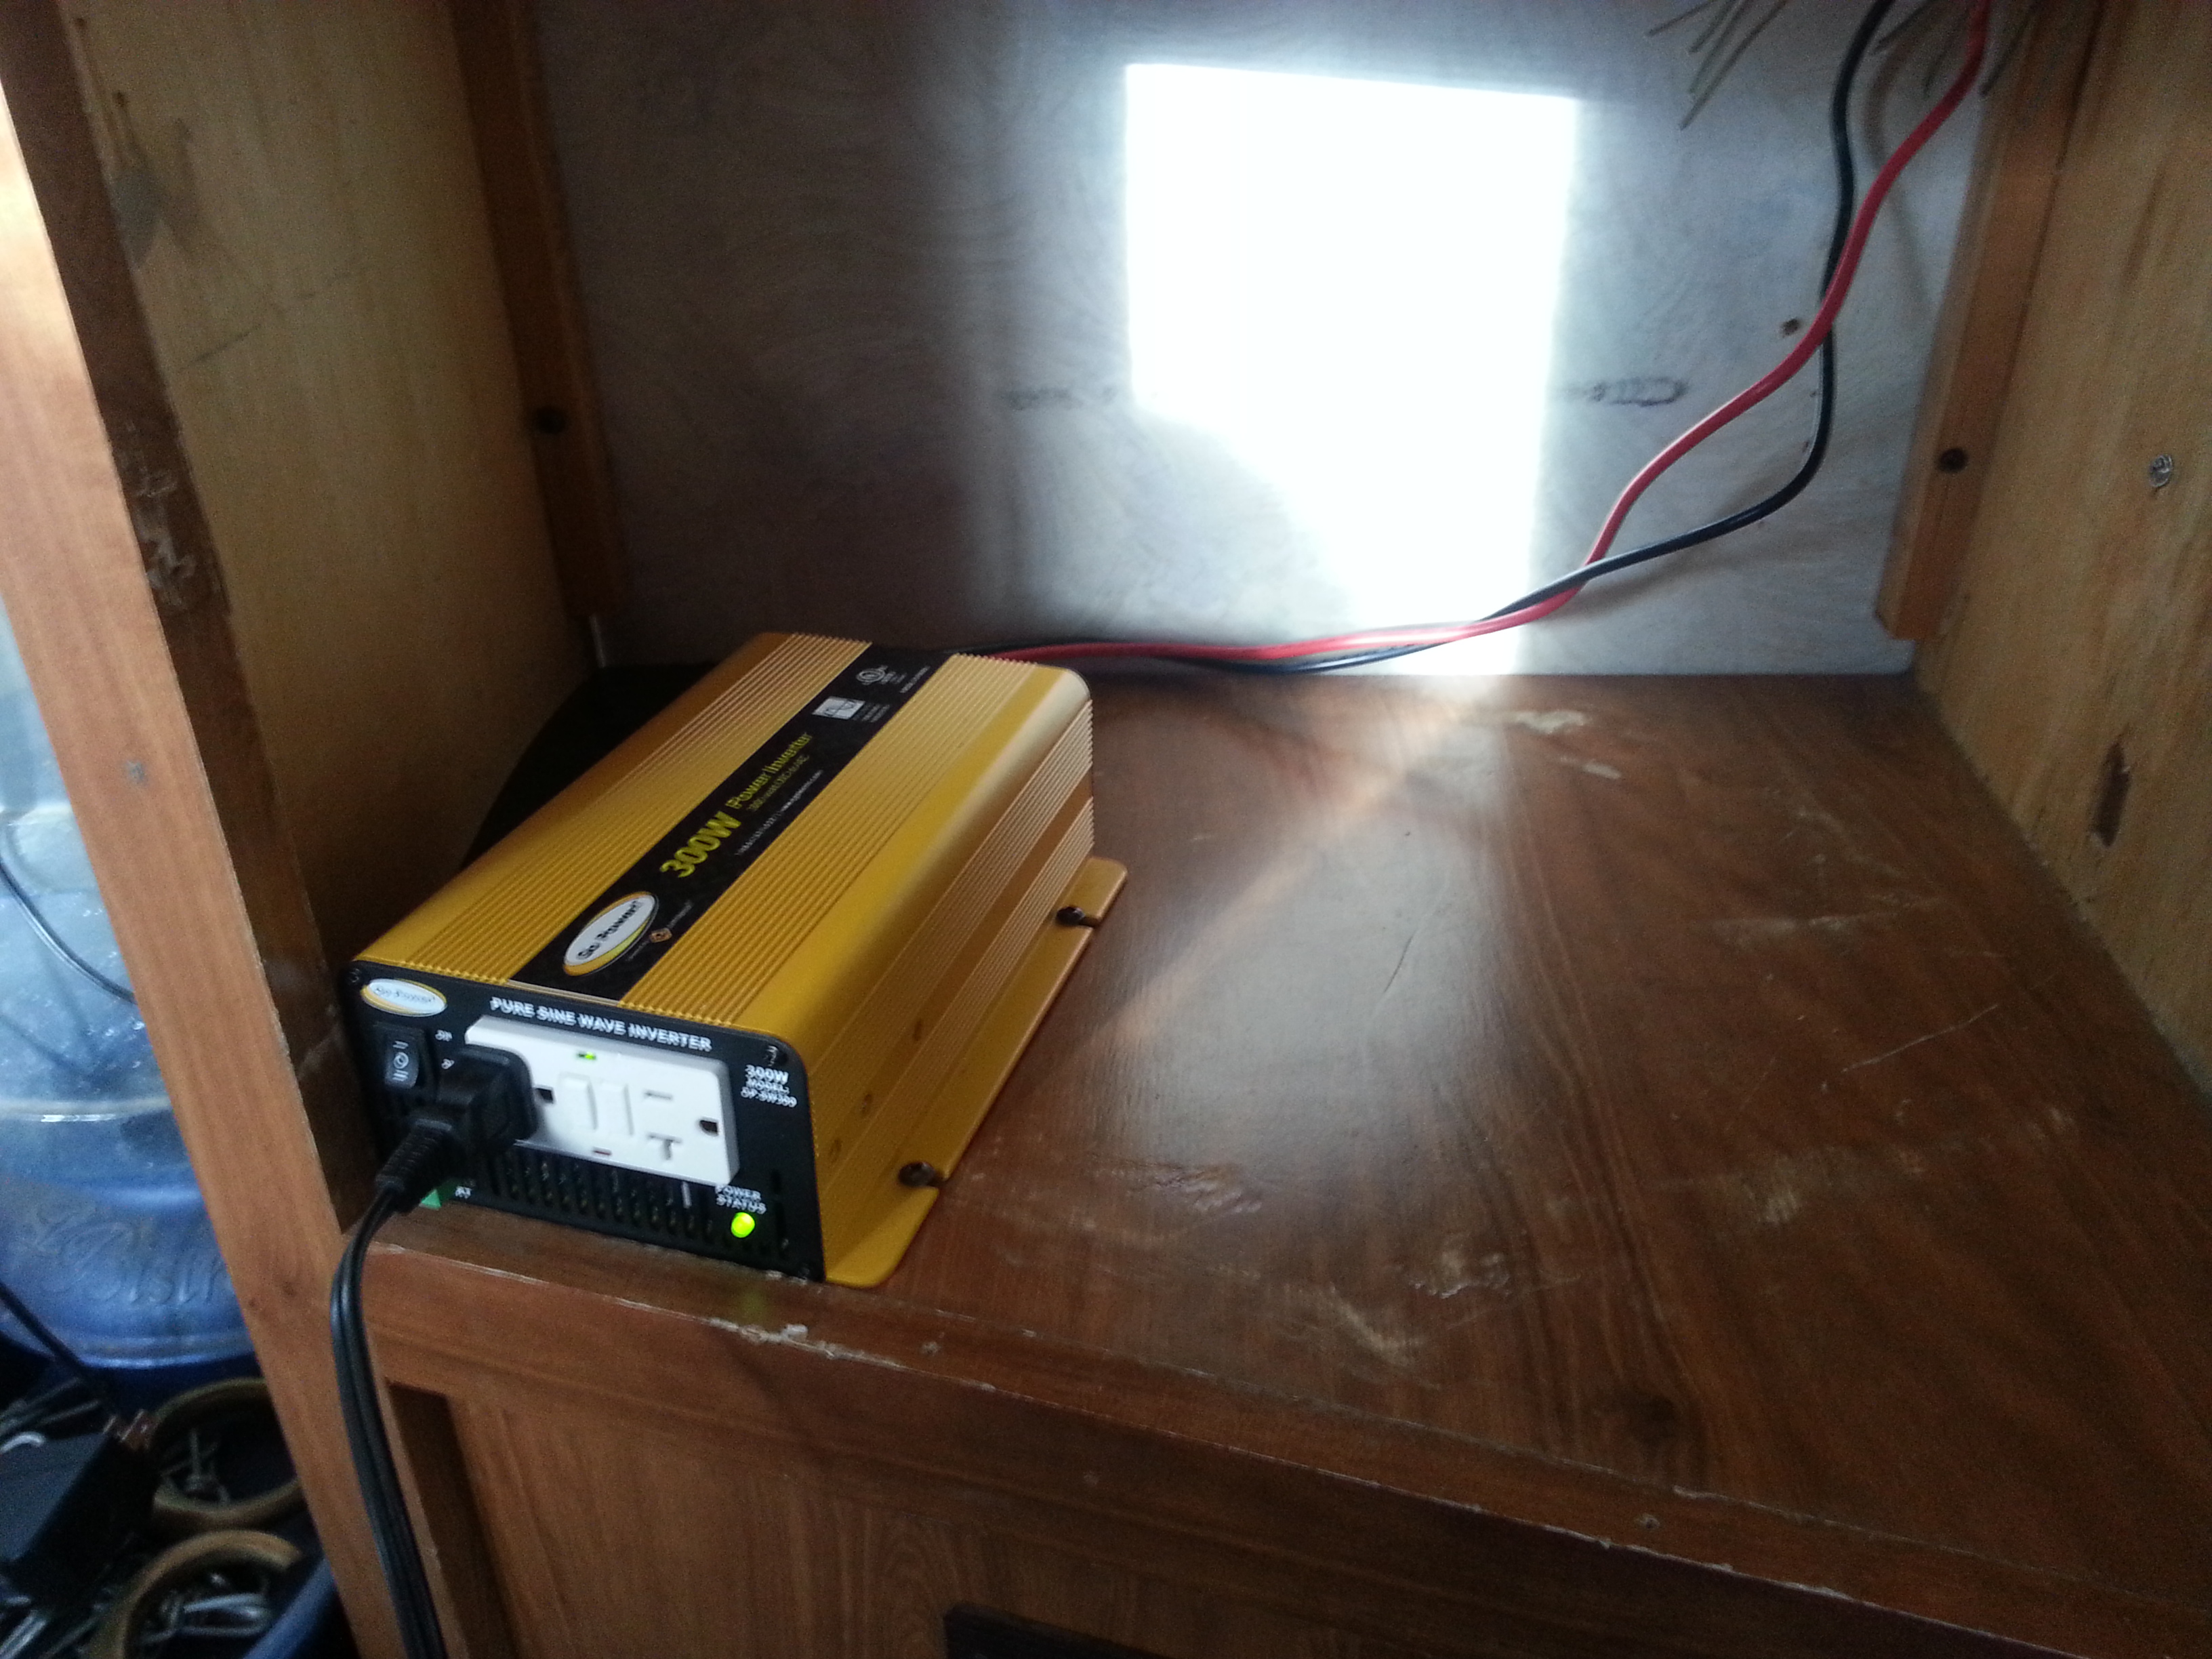
Another upgrade I’ll make as soon as I get some more yellow butt splices is I found there are two wires which bring 12 volt power to the vertical enclosure I’ve been calling a hollow post. The shorter 10 gauge run over (under the floor) I want to reserve for the inverter only and put the other loads (12 volt cig lighter outlet for charging laptops/phones, a single light above the entertainment center we rarely use, and a double ceiling light on a switch which is our best light for working in the kitchen) on a different wire which comes down from the ceiling. (All of this is inside the hollow post.) Once this change is made, we’ll be even less likely to overload that one 12 volt circuit with the inverter by itself. Right now, I’m charging my cordless drill batteries with the inverter and the load isn’t enough to even turn the cooling fan on yet — gotta’ love quiet power. My drill batt charger takes two amps at 120 AC so that’s 240 watts coming from our 300 watt inverter — our biggest load yet. Below is our new inverter — mounted to the shelf inside our small entertainment center. The shelf is about 10″ above the floor so it’s convenient to plug our AC stuff in.


Just looking at your wireing. There is a person on the Web that explains voltage drop at low voltage. And the higher currents in your smaller wires. Solar panels are a bit higher voltage to be able to adjust for this loss in voltage.
Therefore your charge controller should be closer to the batteries with larger and shorter wire from the controller. Also the distance between the charge controller and each battery should be the same length to be sure each battery gets the same voltage for charging, unequal charging wears out batteries at different times.
Wire to the inverter should be short and at least the wire Guage suggest in the “National Electric Code” for safety and even larger to limit voltage drop. Four volts of drop at 120 volts isn’t to noticable, but at 12 volts it’s a quarter of your power. Tesla taught us that voltage drop is a function of amperage.
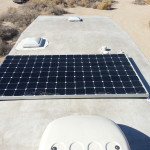
By mounting your solar panels flat the geometry of collecting the suns rays is greatly reduced in winter. To collect the rated wattage of your panel it needs to be perpendicular to the sun.
I wish you luck in your solar adventures.
Our setup is a little different in that we only have a single PV panel. It does 420 watts all by itself and I’ve seen open voltage (no load) from it at 82+ volts. Higher volts = lower amps = smaller wire size. The #8 wire (40 amps) from our panel to the charge controller can easily handle the higher voltage at a little over 5 amps [420 divided by 82 = 5.12 amps). Our MPPT charge controller converts that high incoming voltage to output normal charging voltage for 12 volt batteries. Even #10 wire will handle 30 amps and #8 wire will handle 40 amps. The #6 wire used between our charge controller and the batteries maybe 7 or 8 feet away will handle up to 55 amps = far more than the usual 10 to 20 amps we see being fed to the batteries.
==========
I agree that cables *between* batteries should all be the same length and ours are. If you visualize our four batts in a row, the positive lead is connected at upper right while the negative lead is connected at lower left — this pulls equally from all batts — and charges them equally as well.
==========
Per the circuit feeding our inverter, the wire is #10 (30 amp) and it’s only about 10′ long (minimal voltage drop). At full capacity, our inverter only pulls about 25 amps so I think we’re good. You’re right, we do take about a 30% hit by leaving our panel flat. At our current 30 degree lattitude, the ideal winter angle would be 45 degrees. We have the brackets to do that but because we move our house every week or so, we have determined it’s not worth the hassle or risk to our personal safety to get up on the roof to raise/lower the panel for optimum performance. We still get more power than we use on a daily basis so, at least for now, we’re happy with that choice. If we determine at some point that we want more power, we’ll simply add another panel. That’s just a lot easier for us than getting up on the roof all the time . . . safety first! :o)
You have brought up a very good details , thankyou for the post. daecgbagdaeaeece
Thanks for your positive response. Now I just need to move that charge controller down to the floor where the batteries are. It would run cooler, last longer, and might even charge the batts at a higher rate because it does sense and display ambient temp. 🙂